Showing posts with label dessert. Show all posts

Friday, October 16, 2009

Pillsbury Cinnabon Cinnamon Rolls- Apples & Bannans~

Photobucket

Last fall I was blessed to receive some sample product from Pillsbury! Check out some of the recipes I already posted HERE.

Photobucket

We had gobs of great stuff and wanted to each create something different with the packages of Pillsbury Cinnabon Grands Cinnamon Rolls. Nate chose to make a cinnamon roll apple pie pocket, and I made mini-cinnamon roll bananas foster bites.

Photobucket

To get an idea of the taste and texture of the rolls, I baked up one regular size and two mini rolls before we got started.

Photobucket

Ironically, Nate and I BOTH happen to be people who do not like cinnamon rolls and have never actually had Cinnabon, (GASP!) but we still enjoyed these ooey-gooey rolls and the fun creations that we made! Just to be sure, we had some friends taste-test as well and they gave the thumbs-up. I think for a super-easy, hot, sticky cinnamon roll these are a great time saving dessert or component to a dessert.

Photobucket

BANANAS FOSTER CINNABON CINNAMON ROLLS
By Beth G

1 package Mini Pillsbury Cinnabon Cinnamon Rolls

Bananas Foster Filling
1/4 c unsalted butter
2/3 c packed brown sugar
3 T dark rum
1/4 tsp cinnamon
1 1/2 tsp fine vanilla extract
3-4 bananas sliced (lengthwise, in slices, in bits)- depends on how you are serving it...for this recipe I cut the banana in to little bits
A big hand full of coarsely chopped pecans

Combine the butter, brown sugar, rum, cinnamon and vanilla in a skillet and heat to boiling. Add bananas and cook stirring constantly for about 2-3 minutes.
Grease a mini muffin tin and start peeling the mini cinnamon rolls apart, pretty much un-wrapping them. Rip strips off and layer them in the mini-muffin tin and press down to create a little cinnamon roll dough cup.
Then spoon the bananas foster into the cinnamon roll cup & bake at 350 for 15-20 minutes until cinnamon rolls are golden.
This makes 12 mini-rolls, I actually set aside two of the mini rolls that I pushed the center out toward the outside creating a hole in the middle, like a doughnut. Then I spooned the bananas foster into the center, and baked on a greased cookie sheet at the same temp and time above. We liked both styles, the second method- creating the hole in the middle was even easier than taking them apart and would make a great party dessert!

Photobucket

APPLE PIE POCKETS with PILLSBURY CINNABON CINNAMON ROLL CRUST
By Nate G

Nate used the large/regular sized cinnamon rolls, he got super messy and creative and used the cinnamon roll dough as a personal pie pocket crust.

Photobucket

1 package Pillsbury Cinnabon Grands Cinnamon Rolls
(6 rolls, makes 4 pies)
3 apples, cored and chopped into little pieces
2 T water
2 T flour
2 T sugar
2 T brown sugar
1/4 tsp cinnamon
2 T butter

Photobucket

Unroll the cinnamon rolls on a covered work surface (lay out some wax paper) and kneed into 4 flat ovals.
In a saucepan over medium heat combine the water, flour, butter, sugar, brown sugar and cinnamon, bring to a boil and reduce heat, add apples and cook stirring often for about 5 minutes.
Spoon apple pie filling onto the cinnamon roll dough discs and fold over to create a pie pocket. Press the edges firmly to seal. Bake at 350 for 20 minutes or until dough is golden brown.

Photobucket

Sunday, September 27, 2009

Cobbler: Just Peachy, with a little Apricot love

Photobucket

Moving can be so stressful!! Packing up every little bit of your life and transporting it to a whole new set of surroundings, but it can also be really exciting!! We've had quite a friends who've relocated recently~ We celebrated Naomi's new place with ICE CREAM CONE CUPCAKES and this cobbler was all about Natalie's big move!! Super hot temps made me crave something that was cold and refreshing, but if I'd made an ice creamy dessert it would have been all kinds of melty pretty quick! The late-summer early fall peaches and nectarines had been awesome, so peachy cobbler made perfect sense. Because the white peaches smelled incredible, I choose those, but to birghten it up a bit I grabbed a few ripe apricots and the mix was delish.
This could work with a variety of fruit combos, there will be an apple or apple-pear version coming soon, no doubt.

Photobucket

I had not really made a cobbler since last summer's MIXED BERRY COBBLER which was from "Baking From My Home to Yours" by Dorie Greenspan and it was MY pick for Tuesdays with Dorie!! This is my version of stone-fruit cobbler, so it is a lil different from Dorie's recipe- but I think it's delicious all the same~

Photobucket

Serves 12-16

5-6 ripe sweet peaches
4 apricots
1 tsp cinnamon
3/4 c white sugar

1/2 c shortening
1/4 packed light brown sugar
1/4 white sugar
1 1/2 c flour
2 tsp baking powder
1/2 tsp salt
1 c buttermilk
1 c boiling water
3 T butter

Oven to 350 grease a 9 x 13 baking dish
In large bowl combine the fruit sugar and cinnamon and set aside
In a medium bowl cream the shortening and sugar and slowly add the flower, baking powder, salt and buttermilk a little of each at a time until all ingredients are well combined.
Pour the batter into the pan and spread evenly. Pour the fruit over the batter and spread evenly. Melt the butter in the water and pour the water over the batter & fruit~
Bake for 1 hour 15 to 1 hour and 30 minutes.
Let cool and serve a bit warm with vanilla ice cream.

Photobucket

Tuesday, July 21, 2009

Angel Food Cupcakes

Photobucket

With all the heavy eating we had planned for the 4th of July weekend, I struggled to think of something that would be sweet and desserty at the end of the day with out being too heavy...so I thought angel food cake would be light and still substantial enough for our sweet tooth after a long day of bike riding in the sunshine...

I came across The Cupcakery Blog , where Wendy had highlighted the Angel Food Cake recipe from the Buttercup Bake Shop Cookbook, which was, as promised, easy to prepare.

We are talking MAJOR egg whites here...2 cups, which is about 14 eggs worth...Wendy suggests just purchasing the carton of egg whites (which I didn't do this time, but that would make it even easier, so I will do this next time...)

Photobucket

This made 24 mini cupcakes and 12 regular size…

1 cup cake flour
1 1/2 cups sugar
14 egg whites (2 cups)
1 1/2 tsp. cream of tartar
1 tsp. pure vanilla extract
1/4 tsp. salt

Preheat the oven to 375° degrees and line the muffin tins with paper wrappers.
In a medium bowl, combine flour with one cup of the sugar. Sift these together three separate times. ( I am pretty sure this is essential, so you will need a sifter for this recipe…) Set the sifted whatnot aside and put remaining sugar in a separate cup for later use.
Pour the egg whites into the bowl of a stand mixer and use the whisk attachment, mix on lowest setting for about 1 minute. Then add cream of tartar, vanilla and salt.
After another minute of beating, turn the mixer to medium speed and gradually add the 1/2 cup of remaining sugar. Stop and scrape the sides of the bowl with a rubber spatula after all the sugar is added. Resume beating until the whites are stiff but moist. (This should take about 5 minutes.)Transfer the egg whites to a large bowl. Sift the flour-sugar mixture over the whites and gently fold until all the dry ingredients are mixed in. Using a ladle, fill the cupcake liners about ½ full, or a little less than ½ full.
Bake about 8-10 minutes, but not any longer to prevent the bottoms from burning.
Cupcakes will be done when a toothpick comes out of the center clean. Remove cupcakes from the pan and place on a wire rack. Cool completely before frosting.
I made these and took them (un-frosted) with a big bowl of fresh strawberries and a container of Cool Whip to our HB 4th of July gathering at Jeff & Lia’s and they made a great late night (meaning 9pm) sweet treat!

Photobucket

Monday, July 6, 2009

Housewarming Ice Cream Cone Cupcakes

Photobucket


I am not so much "boxed cake mix" type of gal. Don't get me wrong, I do use it, eat it and use it as a base for other fun stuff. My homie Naomi LOVES Funfeti...and there is only one Funfeti, even if you bust it out "from scratch", we're sure it's still good, but it's not actual FUNFETI unless it has the Doughboy on the box.
She recently moved into a new place and made us all a KICKASS Carribean-Style-Thanksgiving FEAST of a party. I was going to be making guac, but should have gone to farmers market because the grocery avacados were not buneo.

Photobucket

After a memory jogging convo with my mother, I can inform you that this is OLD SCHOOL. We used to make these together (how can anyone wonder how I ended up loving creative food) when my sister & I were little. I thought these would be fun twist on her favorite cake mix, and decided to bring these to the gathering...I was a little nervous because once they were made and gorgeous, I had to get them from my apartment to Naomi's with out dropin the cones!


Photobucket

Fortunately Nate hooked up a brilliant tote using a disposable cookie sheet and 4 plastic cups...we cut holes in the cookie sheet and he taped 4 plastic cups to the bottom...I should have snapped a pic of it, but could draw it for you in a pinch~

This made 12 Ice Cream Cone cupcakes and about 20 mini cupcakes
What you'll need
1 box o Funfeti cake mix (plus the eggs and oil required by said cake mix)
12 ice cream cones
paper cupcake liners for the cupcakes
1 container of FUNFETI frosting
Sprinkles!!

Line a muffin pan with paper cupcake liners (12 regular size and about 20 mini, so prep both pans...)
Preheat oven & make cake according to pacakge...how mellow is this recipe so far??
Fill the cupcake liners about 1/2 full of cake batter and on the 12 full size cups tip an ice cream cone, upside down (BOTTOMS UP!!) into the batter..on the minis just fill em about half full...if you can find mini-ice-cream-cones...then by all means cone them ALL!
Bake according to package for cupcakes, and let cool for about an hour on a cooling rack, with the cones still bottoms up. When they are cool, flip them so they are standing up and peel the paper liners off the cupcakes. Frost with funfeti frosting and decorate like crazy with sprinkles!!


Photobucket

Photobucket

Thursday, July 2, 2009

Fourth of July Pie

Photobucket

I initially made this pie with blueberries and cranberries here , but I am posting an alternative recipe to make it with raspberries instead. Both blueberries and raspberries are very much in season and delicious at the moment, or if you prefer, another way I've made this is in pot-pie tins with blueberries and black cherries HERE.So if you are having a get together this weekend for the 4th, this pie with some vanilla bean ice cream would make a great addition, and in it's own way reps the Red, White & BLUE~ HAPPY 4th of JULY!!

I pretty much use Dorie Greenspan's Good for Almost Anything Pie Crust recipe~ you can find it as posted by Dorie HERE
Blueberry Raspberry Pie
3 cups blueberries (if fresh rinsed & pat dry, or frozen- I used frozen)
2 cups raspberries(I used fresh, rinsed & patted dry)
1/2 cup white sugar
1/4 cup brown sugar
4 T plus 1 tsp cornstarch
1/4 tsp salt
1/4 tsp cinnamon
a wee pinch nutmeg
1 T butter (cut into small cubes)
Top and bottom pie crust for a 9" pie

Preheat oven to 375 & grease a pie tin (or glass in my case)line with bottom pie crust. In a large bowl mix berries, sugars, cornstarch, salt, cinnamon, nutmeg until berries are coated. Pour berries into bottom crust and sprinkle butter cubes evenly over the top. For the top pie crust, it's your choice- I did mine lattice.
After the top crust is on securely, cover the edges of the pie crust with foil to prevent burning (I totally forgot that step & burned the crap out of mine). Place on a foil covered baking sheet & bake for 45-50 minutes or until pie crust is golden brown.
Then turn off the oven and let pie set in oven for 15 minutes. Then let pie cool on the counter for at least one our before slicing.

Friday, June 26, 2009

Key Lime Blackberry Tart

Photobucket

Key lime anything makes me feel like summer all over. It's fresca and yummy and tart and I LOVE IT!! Instead of going full-on pie with whip cream, etc...I thought of how delish this filling would be topped with sugar-tumbled blackberries. Yup, it rocked.
I don't know if just assembling what is pretty much a key lime pie in a tart pan is what makes it a tart, but in this case, it does for me! I highly recommend you try this ASAP~ it's a perfect summery desert, especially after dinner featuring a GLORIOUS SALAD and grilled goodness!!

Photobucket

Serves 12-14
20-30 key limes (about 3/4 c juice)
1 1/2 T zest
2 cans sweetened condensed milk
1/2 cup sour cream
2 tsp sugar


1 1/4 c crushed graham cracker
1/2 stick butter, melted
2 T sugar 1 T brown sugar

2 pt fresh black berries
1 key lime for garnish

Preheat oven to 350-degrees. Grease a tart pan and , mix the crumbs, sugars and butter in a bowl, evenly moistening the crumbs and sugar. Press the graham cracker crust into the tart pan & bake 8 minutes...let cool. You can also just buy a crust, but I like a super thick crust and it always tastes best when you make it fresh!!
Mix the lime juice, sweetened condensed milk, lime zest, sour cream and sugar in a medium bowl with a hand mixer (or stand mixer with whisk attachment).
Pour key lime filling into cooled pie crust. Bake at 350 for about 8 minutes, but don't let the top brown at all. Cool to room temp, then place some plastic wrap over the top so it doesn't form a skin, refrigerate for 1-2 hours or until chilled thoroughly.
Toss the blackberries with a few teaspoons of sugar in a medium bowl, and pour over chilled tart.

Photobucket

Tuesday, June 23, 2009

Shayne's Perfectly Chocolatey Birthday Best Cake Ever...

Photobucket

Gooey dulce de leche filling combined with intense chocolate cake, frosted with a combo of Cool Whip and cream cheese, topped with mini chocolate chips and toffee bits. Really, that can not NOT be delicious, right?! Right. It's awesome!!
This is the marriage of two pretty famous recipes that is truly exceptional. I first made this back in 2007 for Naomi's birthday, and per Shayne's request, made it for her b-day party...

Shayne's Perfectly Chocolatey Birthday Best Cake Ever.
Serves 12

2 C. Sugar
1 3/4 C. Flour
3/4 C. Hershey's Cocoa Powder
1 1/2 tsp. Baking Powder
1 1/2 tsp. Baking Soda
1 tsp. Salt
2 Eggs
1 C. Milk
1/2 C. Oil
2 tsp. Vanilla
1 C. Cup Boiling Water
1 Can Sweetened Condensed Milk
1 Jar of Caramel (Ice Cream Topping)

1 container of Cool Whip & 8oz softened cream cheese for frosting
1 C. Heath Toffee Bits & Mini Chocolate Chips for topping

Photobucket

Prepare a 15 cup bundt pan by spraying with baking spray (with flour).
Pre-heat oven to 350, and sift together the sugar, flour, cocoa powder, baking powder, baking soda and salt. Mix in eggs one at a time, add milk, oil, vanilla, mix well. Add Boiling water and mix. Pour into prepared pan and bake at 350 for 50-55 minutes or until cake tester comes out clean. Cool 15 minutes in the pan, then cool 10 minutes on wire wrack- transfer to plate covered in wax paper.
Mix milk and caramel in a bowl.
Using a straw poke holes evenly spaced in the cake and using a spoon fill the holes and pour over the cake until it soaks in, I usually don't quite use it all...about 3/4 of the mix does the trick..then, let the cake cool completely.
In a large bowl combine softened cream cheese and thawed Cool Whip, & frost cake, top with Heath toffee bits & mini chocolate chips!

Photobucket

Photobucket

Monday, February 16, 2009

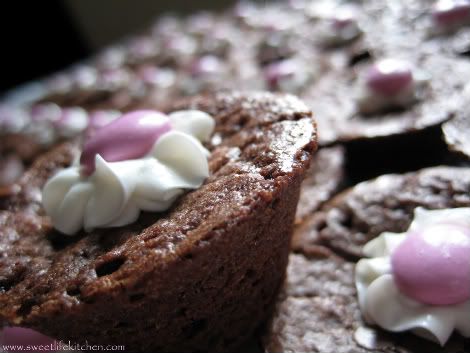
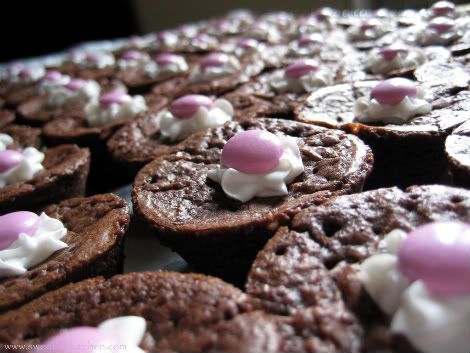
Shower Brownie Bites


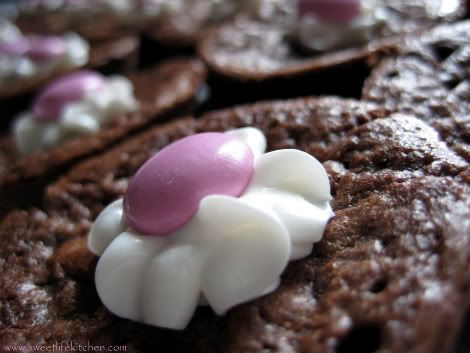
Just another variation, using some frosting from the store and M&Ms for decoration! These were for a bridal shower last month~

Also, it'd been a while since I'd posted the recipe I use when making these lil'guys, so here it is;

My Brownie Recipe
1/2 C. softened butter
1/2 C. Sugar
2 Eggs
2/3 C. Sweetened Ghirardelli Cocoa Powder
1 tsp. Vanilla
1/2 C. Flour
1/2 tsp. Salt
1 T. Hersheys Syrup


Mix Sugar, Butter, Eggs, Vanilla (I mixed using a wire whisk so as not to over mix).
Add Flour, Salt & Cocoa Powder mixing after each ingredient until well combined. Add syrup and stir in using a spoon or spatula.

Sunday, February 15, 2009

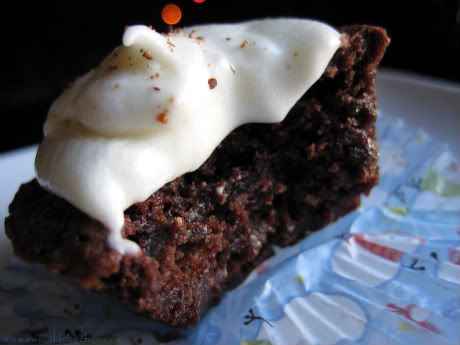
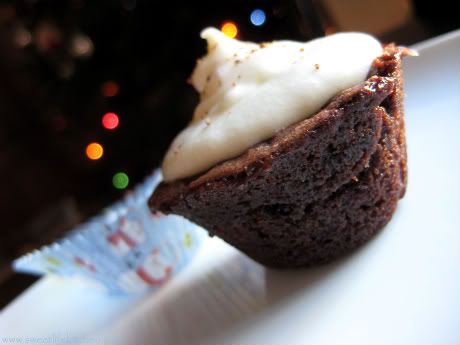
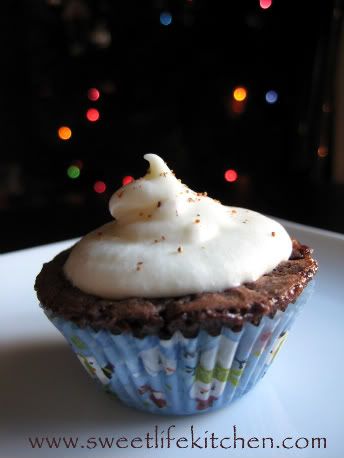
Eggnog Brownie bites


I love brownies bites- easy, peasy portable lil'desserts that are always party-perfect.
These are my Holiday version, served for our 2008 Cocktail/Ugly Sweater Party (I am obviously a bit behind with my blog updating...)
Anyhow, these were just plain ole brownie bites on the bottom, but topped with a egnogg frosting that I sometimes use on gingerbread cookies~


Brownie Bites
For the brownie batter I use MY BROWNIE RECIPE (HERE)http://tinyurl.com/df8a7n, but in a pinch 2 boxes of brownie mix can be used to whip these up quick!

Grease a mini-muffin tin and preheat the oven to 350. Follow brownie recipe for a double batch, this should be enough for 4 batches using a 24 muffin mini-muffin tin.
Fill each muffin cup about 2/3 full with brownie batter (brownies will rise, so just a bit over halfway.) Bake about 7 minutes, until a toothpick comes out clean.

Eggnog Frosting
1 1/4 c butter, softened
4 T. Eggnog (the thicker and spice-y-er the better
1/2 tsp ground nutmeg
3 tsp spiced rum
2 1/2 c powdered confectioners sugar

Combine all ingredients in a stand mixer using the paddle attachment, cream the butter, add eggnog & rum. Continue to mix on medium and slowly add powdered sugar & nutmeg. Whip until the frosting comes together and forms stiff peaks.
Frost cooled brownie bites and dust with nutmeg.

Wednesday, November 19, 2008

Pumpkin Cake...


One of the things that makes our place smell spectacular at this time of year is pumpkin cake.

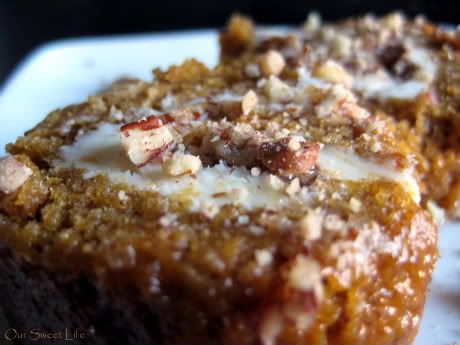
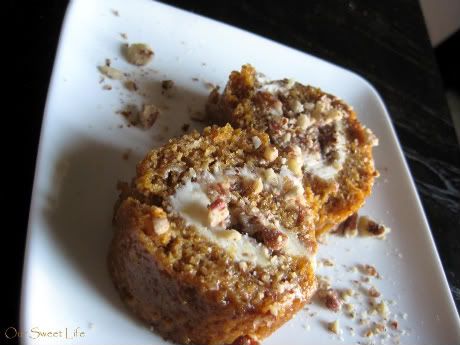
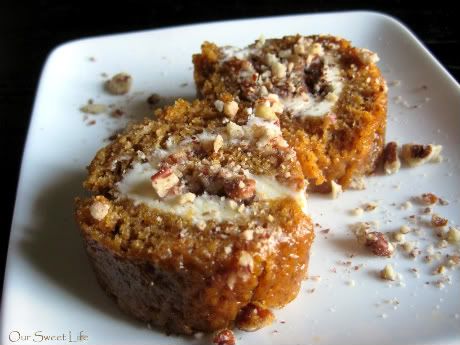
Here are two ways (my favorite coming soon...) to make either a pumpkin roll cake or some yummy bars that will make it feel officially like fall...even if it is 80 degrees, like it has been here in LA.

I used a 10 x 15 jelly roll pan, greased the pan then lined it with wax paper, then greased the wax paper. greeeeasy. delicious... ~


Pumpkin Mini-Rolls or Bars
this recipe is a bit more moist in the cake dpt, and uses more of a cream cheese frosting for the filling

3/4 cups flour
1 cup sugar
3/4 cups pure pumpkin puree
1 tsp baking soda
3 eggs
1 tsp cinnamon
1/4 tsp cloves
a small pinch of nutmeg

Frosting
8oz cream cheese, softened
5 T. Butter
1 cup powdered confectioners sugar
1/2 tsp vanilla

about 1 cup crushed pecans

If you want to go with a roll- dust a thin kitchen towel with powdered sugar so you can roll it up (more on this in the next pumpkin roll post!)

Preheat oven to 375

In a medium bowl, whisk together the flour, baking soda and spices.
Using a stand mixer with the whisk attachment, or a hand mixer (or a whisk & bowl if you are a total badass, which I am not) mix the eggs and sugar, until bright and well combined. Add the pumpkin to the eggs and sugar and mix until fully incorporated, slowly sift in the flour/spice mixture. Pour into the jelly roll pan and make sure the batter spreads evenly to each corner, tip it slightly in all directions. Bake for 15-17 minutes....

While the pumpkin cake is baking, whip up the frosting!
Combine all frosting ingredients using a stand mixer with the paddle attachment.

BARS~

Remove cake from the oven...to make bars let the cake cool a few minutes, then invert the cake onto a sheet of wax paper and let cool completely before frosting.
Cut the cake in half (so if the jelly roll is 10 x 15 you want two 10 x 7.5 inch pieces) frost 1 half of the cake with the frosting, sprinkle with pecans and layer the other half on top. Frost the top, sprinkle with pecans and cut into bars~ (not pictured, got totally scarfed, really FAST!)

MINI-ROLLS~

Remove cake from the oven and let cool 2 minutes, then dust the top with powdered sugar, cover with another piece of wax paper and flip out onto a flat surface removing the pan. Roll the cake up (not too tight) and let cool about 20-30 minutes...unroll and remove the top wax paper. Frost and cut in half, then into thin strips to make "mini-rolls", slice & top with crushed pecans. (this is also a good way to do the roll if you are going for a full sized roll cake and part cracks or breaks!)

Monday, November 17, 2008

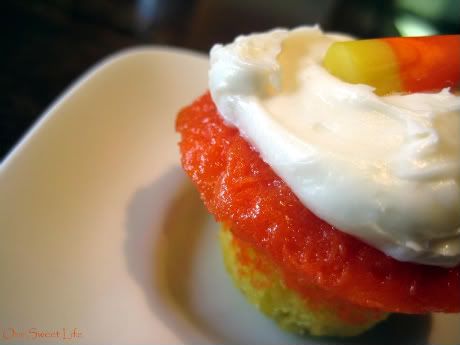
Halloween Candy Corn Cupcakes


Dear lord, HOW CUTE ARE THESE CUPCAKES?!?! There are two ways to do this, with a yummy homemade white cake recipe- like THIS ONE from Dorie Greenspan...or go full blown short-cut style and do it up with boxed cake mix.
These were a bit time consuming, due to the freezing step and the fact that I only had one mini-muffin tin and one regular muffin-tin, but I made some in each size for kicks.
These are great to take to work, school or a party around Halloween, they are as yummy as they are guuuuuud-lookin'!

I made these on a week night since I took them to a Halloween party (which fell on a Friday this year) so here is the method with boxed cake mix...

1 box of yellow cake mix (prepare batter according to package directions, w/ oil, eggs and water)
yellow & red Food dye
White or Cream Cheese Frosting
Candy Corn for decoration...

Prepare the cake mix batter and divide it into two bowls....add about 10 drops of yellow to one bowl of the batter and 15 drops each of yellow & red to the other...you can continue adding even drops of red & yellow to the "orange" half of the batter until it is a light pumpkin hue.
Grease a mini muffin tin and fill each cup about 1/4 of the way with the yellow batter. Freeze the tray for 10 minutes. Fill the cups an additional 1/4 of the way full with the orange batter & bake for 15-20 minutes or until a toothpick comes out clean. Let cool on a rack and frost with white frosting, top with a candy corn!

~This recipe was inspired by a booklet I flipped through in the grocery check out line, I apologize that I can not remember which one, but I literally read it in halfa'second and put it together from what I remembered!!~

Tuesday, September 23, 2008

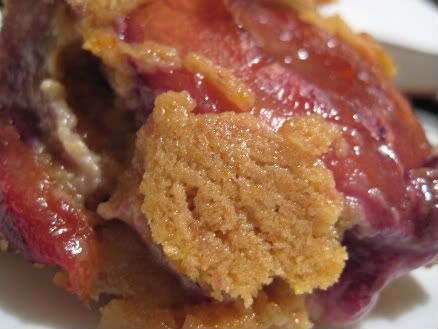
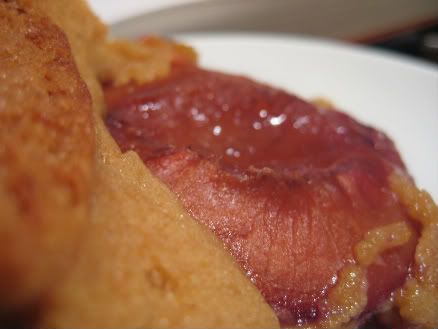
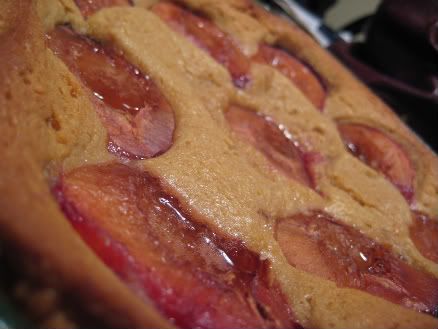
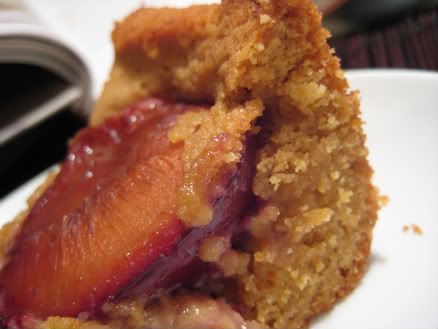
Tuesdays With Dorie ~ Dimply Plum Cake


The past two weeks have been chock full of chocolate cookies! Which has been fun and fabulous, but it was nice to switch it up and bake a delicious breakfasty cake for this week's TUESDAYS WITH DORIE. This week's TWD selection comes to us from Michelle of BAKE-EN.


I did omit the cardamom from this recipe because I did not have any and it was really expensive at my grocery store!
Also, I figured since I took so much liberty with last weeks Chunksters, I pretty much stuck to the recipe with this one. You can find this recipe on Michelle's beautiful blog~
I will say I baked this bad-boy ten minutes longer than the recommended 40 minutes and it was still a wee bit under done in the center, but Nate was demanding PLUM CAKE!! PLUM CAKE!!! So be it. It still tasted very good!


Be sure to visit all the TUESDAYS WITH DORIE blogs that made this cake, many got into theplaying around section in the margin and made some awesome fruit and herb combos!

Tuesday, September 9, 2008

Tuesdays with Dorie~ Chocolate Whopper Malted Drops


I'm going to post this one ON TIME, so as not to continue getting more and more behind! This weeks selection for TUESDAYS WITH DORIE comes from Rachel of Confessions of a Tangerine Tart. When I saw the title of the recipe she chose, my jaw dropped. This sounded INCREDIBLE!

I can safely say I've never made a cookie with Whoppers in it, or using Malted Milk powder...I don't think I perfected this recipe this time around, I need to make it another time or two to figure out a few things. My cookies came out a bit flatter than I had hoped, and am not sure why...The photo in Dorie's book is stunning and they are big, thick, fat cookies. So, I'll try these again soon after I visit all the other TWD'er's blogs and get an idea of what I may have done to have big flat pancakey whopper cookies. They were DELICIOUS flat Whopper cookies, so that was good news.


Head on over to Rachel's blog to get the recipe and check out the TWD Blogroll for more awesome Malted Drops! I'll be right back with belated TWD editions (Blueberry Sour Cream Ice Cream and Granola Grabbers! New computer in full effect!)...

Monday, July 14, 2008

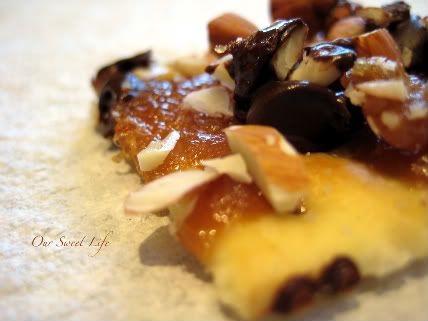
Nicole's Famous CRACKers


A co-worker brought these lil'devils in to work a while back and I (our whole office) LOVED them!!! It is a super easy, super budget-friendly, great-take-to-a-party treat, so (with Nicole's permission) I had to share~

We re-named them CRACKers because, as you will find, these are completely addictive and I DARE you to only eat one!

THANK YOU NICOLE for letting me post this for everyone to enjoy!

What you'll need~
1 stick of butter
1/2 cup packed brown sugar
a package of saltine crackers
chocolate chips
any nuts chopped or crushed (pictured with almonds, MY FAVORITE!)

Preheat the oven to 400. Get a cookie sheet out, cover with foil and lay crackers out all over the cookie sheet. Take the stick of butter and brown sugar and melt together in a small pot over medium heat don't stir until it is all melted!!, now wait for the sugar/butter to caramelize (you will notice big bubbles)- once that happens, remove the pan from the heat and use a spoon to drizzle the caramelly goodness all over the crackers. Then sprinkle the crushed nuts on top.
Bake for 5-7 minutes. Take the crackers out and IMMEDIATELY sprinkle the chocolate chips over them, then transfer off the cookie sheet to cool before the chocolate chips re-harden.

Wednesday, July 2, 2008

Running way behind, but I have CHEESECAKE!


Ok, so I have got a TON of catching up to do!! As you know, I fell off my blog-wagon back in April, with work, life and just WAY too much going on around me, I have stacks of drafts in my little blog-post-storage!! So, it's time I start getting caught up!!


This is actually my DARING BAKERS challenge from APRIL! (can you believe that, totally embarassing!) To keep it honest, I did not complete May's Opera Cake Challange, and I am doing my June goodness THIS weekend, but then I'll be all caught up, in the DB department at least!

These were probably my absolute favorite DARING BAKERS Challenge so far (since joining in December of 2007)


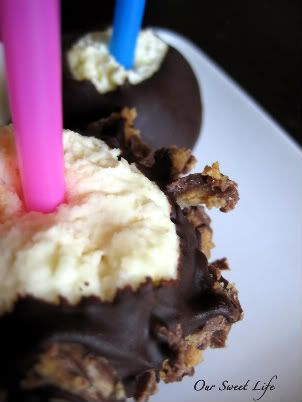
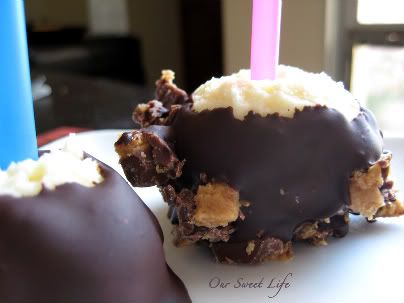
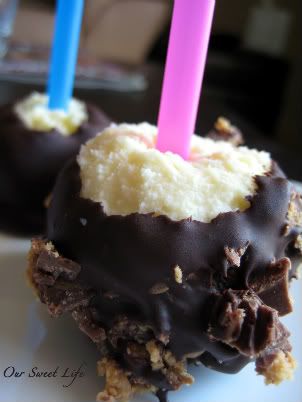
This challenge was chosen by Deborah of TASTE and TELL and Elle of Feeding My Enthusiasmshere are the links to their cheesecake pops, where you can find the recipe and many glorious versions of this super crowd friendly desert! This recipe comes from a must-own book of deliciousness, Sticky, Chewy, Messy, Gooey by Jill O'Connor.


This was not too difficult, was SO impressive, and will be a go-to party desert for me for the rest of my life!! You can really go in any direction with these as far as decorating them- dark chocolate, milk chocolate, sprinkles, nuts, etc...the possibilities are endless!!

I did end up cooking mine about 15-20 minutes longer than the recipe called for, let it sit for 15 minutes with the oven off and door closed after cooking was complete.
I used straws from the grocery store that I cut with kitchen scisors, and mine are dipped in dark chocolate (some rolled in cut up reeses p.b. cups- but that didn't work too well, but well enough I think I'd just go crushed nuts & sprinkles next time...)