Thursday, August 27, 2009

Heirloom Tomato Snack

Photobucket

Recently I ventured to some new destinations in the virtual world. I created a FACEBOOK FAN PAGE for the Sweet Life Kitchen and also had to hop on to TWITTER and figure out how to be a good tweeter.Last week I TWEETED my favorite SLOW-COOKER PULLED PORK recipe, a dish so easy to make the instructions fit in just 140 characters!

This made me want to come up with more so-easy-you-can-tweet-it recipes.
Then I found this seriously gorgeous, big, giant super firm heirloom tomato. My sister said one of her favorite ways to do up one of these bad-boys is to slice em up & toast them with mozzarella.
That sounded way to good to resist. So here is the full (but still less than 300 character) version.

Slice a firm heirloom tomato in 3/4 inch slices and cover with shredded mozzarella cheese. Broil in the toaster oven for about 6 minutes or until the cheese is golden bubbly. Serve with cracked black pepper and torn fresh basil if you've got it!!

Feel free to follow along on Twitter, as I am planning to try and tweet at least one full-on, start-to-finish recipe per week, and hopefully more often if I can!!

Photobucket

Wednesday, August 26, 2009

Yummy French Toast

Photobucket

We had this at Lia & Jeff's on the morning after 4th of July last year and talk about it all the time. This is a great way to kick off the weekend, which is exactly what Nate did. After a dear friends 30th birthday celebration last Friday night, I needed a little food-therapy Saturday morning to recover! Nate headed off to the store with my single request, "Get some fruit!". He returned and busted out this delicious French Toast w/ a little bacon on the side!

Serves 4
Loaf of King's Hawaiian Bread (you won't use the whole loaf)
3-4 eggs
1/2 cup whole milk
small pinch of cinnamon
1-2 tsp brown sugar
Strawberries
Syrup

Slice 4 pieces of the loaf about an inch thick. Heat a large non-stick skillet or griddle to medium/medium-high heat. Whisk the eggs, milk, cinnamon & sugar in a shallow bowl. Dredge each slice of bread in the egg and toss em on the griddle! Cook until the bottom is golden, 3 minutes or a bit more...then flip em and do the same on the other side!
Then slice up a few strawberries and drizzle with syrup! (you can sprinkle with powdered sugar if you want, but they were sweet enough just like this too!)
I love this served with chicken apple sausage, but anything to add a little salty breakfast goodness, like bacon or ham is a delicious addition.

Photobucket

Monday, August 24, 2009

Ginger Steak Kabobs

Photobucket

Here is another perfect picnic staple. We have been spending the last few weeks dining out doors pretty often and have a few more picnic dinners before the summer fades to football! But then...there's FOOTBALL!!! I am already plotting my opening weekend tailgate menu and we are all very excited to be back at the Coliseum for another winning season~ GO TROJANS!! Ok, back to kabobs~ these are great for a summer bbq, pool party, tailgate AND easy enough to make a fabulous work-night dinner, with out a major mess. (mmmmm less-mess, my favorite!!)

This made 7 all meat kabobs and 8 pineapple veggie kabobs

1.75-2 lb London broil, cut into 1 to 1 1/2 inch cubes
1 sweet white onion
1 pineapple
2 green bell peppers
1 red bell pepper

Marinade
1/3 soy sauce
2-3 tsp fresh grated ginger
3 chopped green onions
3 T teriyaki sauce


Combine the cubes of steak and marinade ingredients in a bowl~ mix, cover and refrigerate for about an hour.
Soak bamboo kabob skewers in water for about 1 hour (while meat marinates & you chop the veggies & pineapple)
Make all-meat skewers with the beef, and then make all veggie-skewers with the veggies!
Grill all skewers for 8-12 minutes flipping every few minutes to grill on all sides, leave the meat on an additional 4-6 minutes for medium-well to well-done kabobs.
Remove meat and veggies from kabobs and serve over steamed brown rice drizzled with soy or teriyaki sauce.

Photobucket

Friday, August 21, 2009

Grilled Picnic Chicken

Photobucket

Sometimes you just want COLD grilled chicken, especially on a beautiful summer night while picnicking at the beach. This was absolutely one of those occasions. In Santa Monica for the past 21 summers, there are free concerts down at the pier every Thursday! Seriously!! So living about 7 miles from the pier in Culver City, we've been biking down there the past few weeks and enjoying some fun time outside and doing one of my favorite things in the world- eating dinner on the beach! It's incredible to be able to be on the sand, on a weeknight, with our friends just taking in the summer. I like cold picnic chicken because it's a make ahead basic, super-easy recipe.

Nate came up with a slightly spicy, super savory dry rub recipe that was really delicious!

We grilled this chicken the night before and it chilled in the fridge the whole day of the picnic, which was perfect for us!

Picnic Chicken

1 package chicken drumsticks and thighs (our store had a pkg with about 12 pieces total)

Shimmy shake these items over the chicken, to lightly coat the skin and massage in~
Paprika
Garlic Powder
Onion Powder
Sea Salt
Black Pepper
Chili flakes (a lil'pinch on each side of the chicken)

Heat the grill to medium high heat and place the chicken on the grill, let it cook 6-8 minutes, then flip and grill another 6-8 minutes, flip again and cook 5 minutes. Then flip again, turn off the grill and cover with grill lid. Let sit for 5 minutes, remove from grill let cool then serve or refrigerate for taking off to the beach for a picnic later!!

Photobucket

Wednesday, August 19, 2009

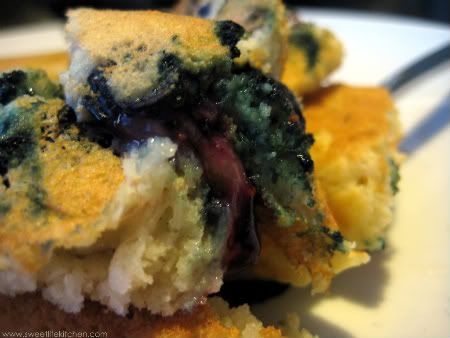
Blueberry Ricotta Pancakes

Photobucket

Ok, there's one question- Are you aware of the show, "The Best Thing I Ever Ate" on the Food Network?? If you don't know what I am talking about, stop reading and go set your Tivo RIGHT NOW.
Do heed this warning; you're not going to want to watch this show if you are hungry or if you are trying not to attempt making a blueberry ricotta pancake at 10:30pm on a weeknight...

The episode that inspired this recipe was "Breakfast" and our jaws dropped when the Blueberry Ricotta Pancake at B.L.D. (Breakfast Lunch Dinner) on Beverly, Blvd came onto the screen.
Not to mention that the front of my office was in the shot of BLD's exterior...I have been working literally RIGHT ACROSS THE STREET from this glorious pancake since the restaurant opened and this is the first time I am hearing about it?!? Ok, I do pretty much only go there for L or D, and have yet to make it there for B, but do plan to SOON!

In the meantime, Nate and I had to at least attempt to make this glorious flavor combination happen.

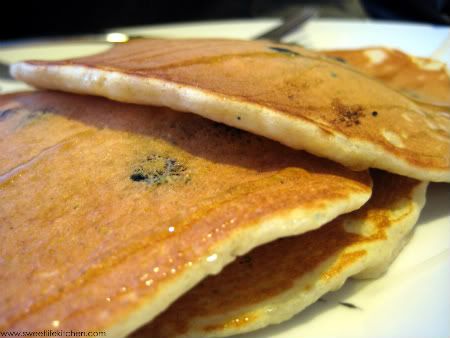
We didn't have any buttermilk, but I forged ahead and used my normal pancake recipe, using whole milk instead.. but whipped the egg whites, per BLD...which I've never done before! Fun and flufftastic~
Photobucket

Blueberry Ricotta Pancakes, inspired by BLD in Los Angeles, CA
Makes about 12-14 pancakes

2 eggs
2 Tbsp butter, melted
1 2/3 c whole milk
1 2/3 c all-purpose flour
1 3/4 tsp baking powder
1 3/4 tsp baking soda
1 pinch of salt
1 T. sugar
1/2 cup ricotta cheese
a few handfuls of fresh blueberries

Separate the eggs, and whip the egg whites into stiff peaks. (I use a stand mixer with whisk attachment)
In a large bowl, while the egg whites are whisking sift the flour, baking powder, baking soda and salt.
Pour the milk, butter and sugar into the dry ingredients and mix until incorporated, using a spatula fold in the egg whites and add the ricotta in tablespoon sized drops and lightly mix in.

Heat a large frying pan or griddle to medium high heat. Using a ladle scoop about 3/4 of a cup of batter onto the heated surface. Drop as many blueberries as you'd like (I think we did 5-7 per pancake). Wait until you see bubbles across the surface and the bottom of the pancake is golden then flip & cook until lightly golden.
I loved these topped with a drizzle of honey and a little bit o' butter~

I'll have to try the BLD version soon and then make these again!! Stay tuned...

Photobucket

Saturday, August 15, 2009

Italian Kabobs~ Picnic, Party Perfection!

Photobucket

This has to be the perfect party food...well, I suppose anything on-a-stick would fit into that category..but nonetheless these travel well and are super-delicious!
I saw these at the Hollywood about a month ago, when we brought the bison meatballs & broccoli salad. The family in front of us busted out Tortellini-Kabobs and I flipped out!

I decided that I HAD to make my version of that for our next trip to the bowl...time came for Reggae Fest and Nate and I hit the store together to gather the bits for these kabobs~

Tortellini was the one must, everything else was open season on yumminess...
The possibilities are endless here, and if I'd not spent the morning of this Bowl Sunday watching Julie & Julia with my mom & sister, I would have busted out some mini-homemade meatballs for these scrumptious sticks....next time!

Photobucket

This will make 20-30 kabobs, there may be some leftover bits of one or more ingredients, but they are all pretty good leftovers to have and whip up a good dinner with the next night!

2 containers mozzarella balls
1 large pkg cheese tortellini, boiled drained and cooled
1-2 small packages grape tomatoes (there a lil smaller than cherry tomatoes, which would also work just fine)
A jar of whole pepperoncini, chopped into strips
1 pkg fresh basil
1 10oz Italian dry salami cut into 1/2 inch thick slices, then cut into 1/4ths
1 jar of garlic green olives (either garlic stuffed or a jar with both garlic cloves and olives in it)
(you can kind of go nuts here, sliced pepperoni would be good, fold up and skewer...
you could cook and cool Italian sausage, mini-meatballs...anything you can think of!)

Photobucket

Just start alternating ingredients as shown in the photo~
Then place on a serving tray, or in our case in a foil tray that we could tote to the bowl...and drizzle with olive oil and sprinkle with some sea salt & cracked black pepper!

Tuesday, August 11, 2009

Grilled Shrimp w/ Nate's Cocktail Sauce

Photobucket

A few weeks back we made some pretty spectacular OYSTERS and while he was picking those up at Santa Monica Seafood, Nate grabbed some shrimp to go with them! This is just a very simple way to grill shell-on shrimp for peel-n-eat goodness. I love these because the completely scream SUMMER!! Nate whipped up a little homemade cocktail sauce to really take these to the next level.

Grilled Shrimp

12 raw, shell-on shrimpies
2 T butter, room temp
1 t olive oil
2 tsp crushed garlic
2 T minced shallot
sea salt & fresh black pepper

Start by deveining the scrimps, this is pretty mellow once you've done it before...it sounds harder than it is, I promise!

Photobucket


Lay the little gray bastid on it's side and use a super sharp knife to cut a slit (about 1/2a centimeter deep, just piercing through the shell and cutting a bit into the shrimp)
Use your thumbs and first fingers to peek inside the cut and while gently running cold water over the shrimp and your hands, remove the dark digestive tract of the shrimp.
There. Done! YAY!! I got better with practice and by the last one I was an ace- this is not as intense as it may sound all typed out~
Here is a video from YouTube courtesy of epicurious- it does show peeling the shrimp before deveining, but notes that the peeling is not necessary and in fact helps the shrimp retain yummy flavor if left in the shell during cooking...

CLICK HERE TO WATCH


Heat the grill to medium low heat.
Anyhow, now that your shrimp are deveined, mix the butter, olive oil, garlic, shallot salt & pepper in a small bowl until well combined. Rub butter mix all over each shrimp.I skewered them onto kabob sticks to make them easier to flip.
Cook 3-5 minutes on each side until cooked through.


Nate's Cocktail sauce
Catchup, a few dashes Frank's Red Hot hot sauce,black pepper, a dash olive oil, stir all together!

Squeeze a bit of lemon over the shrimp and serve! This is great with tabouli, grilled veggies and of course the GRILLED NAPA OYSTERS we ate with them!!