Showing posts with label appitezer. Show all posts

Friday, February 20, 2009

Cocktail Latkes


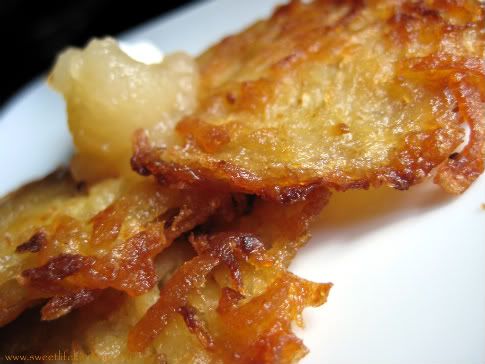
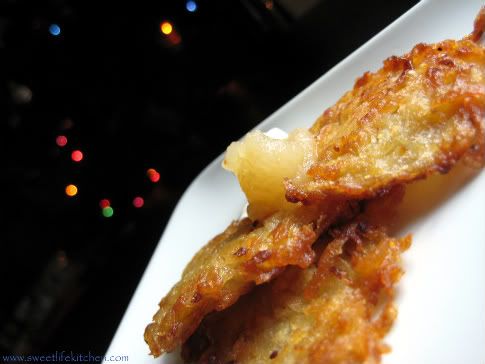
These are a fabulous, and relativity in expensive appetizer for a party or a holiday dinner.
I made these "cocktail-sized" (using about 1 T. of the potato mixture per latke) and following that method this makes about 80-something latkes
You can always make them more traditional-sized and that would probably produce 1/3 as many.

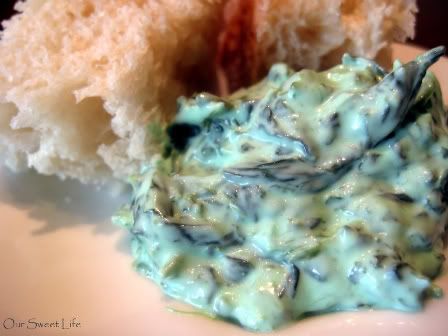
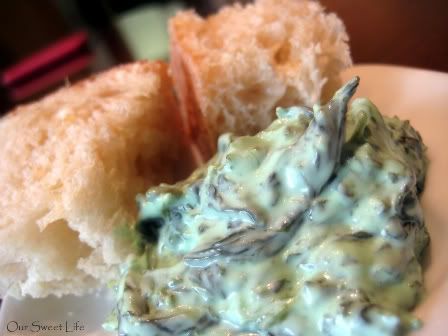
I've made these a few times before and this is my recipe...it is a bit time consuming (when you are making a whole bunch of them!) but totally worth it. These are served with homemade apple sauce & sour cream~


8 medium-large Idaho baking potatoes
1 cup matzo meal
7 eggs
Salt
Onion powder
1 1/4 shredded sweet white onion


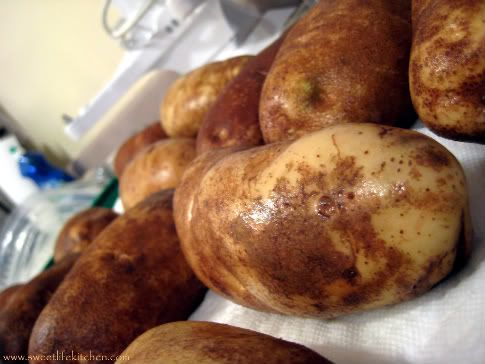
Wash & peel the potatoes, then grate (I get out a giant bowl and fill it with ice water, the potatoes sit in that while waiting to be grated)...I used the larger grater blade on my food processor. Immediately after shredding soak the potatoes in cold/ ice cold water, rinsing with clean cold water until the water is clear and shredded potatoes are clean and white.
Press as much of the water out as possible using your hand and some paper towel. Lay a piece of wax paper over a cookie sheet and place several layers of paper towel on that.
Dump the potatoes out onto the cookie sheet and press a few layers of paper towels on top, a few times to remove as much of the water as possible. You can also strain them quickly with a cheese cloth to get additional moisture out.
Shred the onion, squeeze the liquid out as much as possible.
In a small bowl whisk the eggs
In a LARGE bowl combine the shredded potato, the onion, the eggs, the matzo meal, onion powder and salt, mix well.

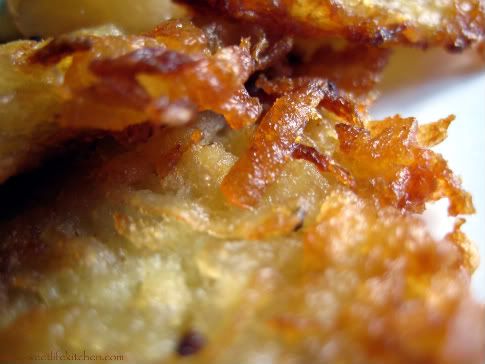
Heat just enough oil to keep the bottom of the pan covered on medium low heat for about 5 minutes. Drop the potato mixture into the heated oil (I did about a tablespoon at a time), then press to flaten a bit. Fry about 4-5 minutes on each side (until golden) and set on paper towel to cool. Serve warm or room temprature with some applesauce and sour cream.

These can be made up to two weeks ahead and frozen. I buy some good sturdy disposable plastic storage (the "oven ware" is a great size), line it with wax paper and then add a layer of cooled latkes, topped with a layer of wax paper...and so on, like lasagna I cover the top with press-n-seal to keep it really well locked in.

To re-heat...
Pre-heat oven to 350
Cover a baking sheet with foil, spread latkes over the foil, cook for about 7 minutes or until hot!

Wednesday, January 21, 2009

Goat Cheese Bites


I made a variation of these last year for our holiday sweater party and think that you pretty much can't miss with fig & goat cheese!
These are a simple and beautiful appetizer that freezes well and can be made ahead, and heated up as the party moves along! I love the fig preserves at the holidays- but these are great with marmalade or other preserves to reflect different seasons.


Makes 60-70
12 oz goat cheese
8 oz softened cream cheese
one egg
3 boxes of frozen puff pastry
2 jars of fig preserves

Let the puff pastry thaw on the counter. Using a hand mixer combine the goat cheese, cream cheese & egg. Using a small biscuit cutter (about the size of a silver dollar) cut circles out of the puff pastry sheets...place a circle of puff pastry in a greased mini-muffin tin, add a scoop of cheese mix, top with a dollop of fig preserves. Bake at 350 for about 25 minutes or until cheese and puff pastry is golden.
You can freeze these and then just re-heat them at party time! :O)

Sunday, November 16, 2008

Swampy Spinach Dip~ Halloween Party Recipes


This was another Halloween party treat, there is no real slime involved! This is a very basic recipe for a cold spinach dip, with a little green food dye, helping to bring a little veggie love to the fiesta. I served this with bread, carrots, celery and red bell peppers... I would make this again with out the dye (swampyness) because it was a really great dip!! I know this is a few weeks late, but I'm feeling pretty productive getting it up before Thanksgiving! More Halloween fun to come!!

This recipe is courtesy of All Recipes, click the link for the original recipe.

Here's my "Swampy Party" version...
Serves 30-40
1 1/3 cup mayonnaise
2 16 oz. container sour cream
2 1.8 oz) package dry leek soup mix
1 8 oz. can water chestnuts, drained and chopped
3 10 ounce package frozen chopped spinach, thawed and drained
Fresh cracked black pepper (just a bit to taste)
Green food dye- for swampy spookieness

Mix all of the above ingredients in a large bowl and add the food dye until it is the desired color of swampy green. Cover and refrigerate 8 hours to overnight. Serve with chopped Italian bread & veggies like celery, carrots & bell peppers~

Monday, October 27, 2008

Turkey Sliders with Apple & Swiss


Every once in a while there is a Thursday night college football game that we all RACE home from work to watch, and this meal was perfect for one of those nights! The game started at 6pm and we were having 8 people over, so since I get off work at 5 and have a 30 minute drive, this needed to be something easy, yummy and that would count as dinner for everyone.
These Turkey Burgers combined with the mini-baked taters (coming soon) were perfect, and totally reasonable budget-wise!

Makes 8 Mini Burgers

Kings Hawaiian wheat buns
1 lb lean or extra lean ground turkey
1 Apple, cored and chopped
1/4 sweet white onion chopped
1/3 cups Bread crumbs
1 T. Worstecire sauce
pepper, salt, garlic powder to taste
Swiss cheese

In a medium bowl, using your hands, combine the turkey, apple, onion, bread crumbs, worstecire sauce, salt, pepper and garlic powder. Form 8 small patties.
Grill over medium-high heat for about 7 minutes per side, flipping once or twice.
Add Swiss & turn off heat, put buns on the grill to toast close grill and let cheese melt & buns toast.

Sunday, October 26, 2008

Pillsbury Recipe Creations~ Taco Bites


As part of the PILLSBURY PACKAGE we received I had the good fortune of trying the NEW Pillsbury Recipe Creations, that is basically sheets of the Crescent Roll dough, but with out the triangle perforations.

This is a variation of one of my favorite recipes using the Pillsbury Crescent Rolls, Nate's mom's TACO RING, which if you've not tried it- put this on the menu ASAP because it rocks the heezie.

1 package Pillsbury Recipe Creations
about 1/2 a pound taco seasoned browned ground beef
refried beans
shredded cheddar or pepper jack cheese
hot sauce or salsa
chopped onion

Grease a mini muffin tin and pre heat the oven to 350.
Cut the Recipe Creations dough into squares and lightly press into the muffin tin. Add about 1 T of beans then 1 T of taco meat, then a pinch of onions, dollop of salsa or hot sauce, and top with shredded cheese.
Cook for about 20 minutes or until dough is golden brown and cheese is melted.


Thursday, October 23, 2008

Super Sunday Jalapeno Poppers


Ok, I think you can tell I've got a big ole crush on appetizers. I think that's my official favorite thing to make, apps, tapas, snacks and bites, I love 'em. Cocktail munchies, foot ball nosh, it's all good in this hood~ and these are a perfect testament to the finest of snacky-tapasy-bites; breaded, fried jalapeno poppers! This is a combo of two recipes that I've had written down so long ago I'm not so sure where they came from...the bacon was a last minute addition since I still had some left from the previous week's CHEESY BACON DIP, and think these were fabulous, but would be awesome with out the bacon too!


makes about 50 poppers

12 med-large jalapeno peppers, with seeds and most of membrane removed, cut lengthwise in half, then cross-wise in half so each pepper makes 4 bite-sized bites.

filling~
1 8 oz brick of cream cheese softened to room temp
1/2 cup shredded jalapeno jack cheese
1/4 cup shredded cheddar cheese
1/2 tsp cayenne pepper
black pepper
pinch of kosher salt
4-8 pieces of bacon, cooked, most grease removed, cooled, and chopped up.

Bread crumbs
Flour
Cayenne pepper* optional
milk
hot sauce* optional...

*(only if you want these to be SPICY)

oil for frying

In a large bowl mix together all the "filling" ingredients. Using a butter knife (or your fingers, which is what I did) add about 1 Tablespoon of filling to the inside of each jalapeno 1/4. Fill a small bowl with bread crumbs and cayenne pepper (about 1/8 tsp). Put about 1/3 cup of flour in another small bowl, and in a 3rd bowl, pour about 1/3 cup milk, add a few dashes of hot sauce for spicy-factor!

Cover a cookie sheet with wax paper. Take the stuffed jalapenos and dip them first in the milk, then the flour, then set on the cookie sheet. Let them "set" for about 7-10 minutes. Then give em another super quick dip in the milk, then coat with bread crumbs, place the bread-crumbed poppers back on the cookie sheet to chill out again for about 7 minutes. (I did not do this next step, but will next time after doing some searching online and reading more recipes like this one...)Repeat the milk & bread crumb step a second time to REALLY coat these puppies, meanwhile heating about 1-2 inches of frying oil in a large pot or pan (deep enough for the oil and so you don't get burned!)
Using a slotted spoon or one of those cool wire-basket-on-a-stick things that is made for stuff like this (that of course I do not have) gently lower the poppers into the hot oil and fry for about 3 minutes or until golden brown. Transfer to a plate or cookie sheet covered in paper towel to let cool and to sop up excess oil.


Tuesday, October 21, 2008

Grown-Up-Pigs-In-A-Blanket (Pillsbury Recipe Creations)


It is football season again, and we headed down to the Coliseum on a cloudy drizzly Saturday determined to get in some pre-game tailgating, a few Saturdays ago. I am sure some of you living in other areas, outside of Southern California may not realize what the big deal about a little drizzle would be, but here people can get a little freaky over some mist. Thankfully, it turned out to be a great day- the air got a little damp in the third quarter, but it was all good.
I made these with the Pillsbury Recipe creations~ super, super easy and a great tailgating snack!


1 package Pillsbury Recipe Creations
1 package fully cooked chicken apple sausage (should be at the regular grocery store or Trader Joes)
Herb'd goat cheese, at room temp
toothpicks (wooden)

Pre heat the oven to 350 and line a baking sheet with foil.
Chop the sausage into bite-sized bits. Roll out the recipe creations and cut into 4-5 strips long-ways, then cut across to make about 30 + little squares. Using a butter knife, add a bit of goat cheese to a piece of sausage and wrap the dough around it using the toothpick to hold it sealed in place.
place the wrapped sausages on the baking sheet and bake 25-25 minutes or until crescent dough is golden.
Cool and serve~

Sunday, October 12, 2008

Our Fabulous Ginger Wings


These are my go-to un-buffalo-wing. They are fabulous for football watching afternoons, tailgates and any kind of party, really. They are baked, not fried and could not be easier to make.

I made these for a tailgate before a USC game- I baked them in a disposable roasting pan, then transferred them to a cool clean roasting pan- covered in foil to transport to the game!


Wings~
About 3-4 lbs Chicken Wings, cut in half~ tips cut off

Marinade/ Sauce~
1/2 C low sodium soy sauce
1/2 C water
1/2 C sugar
1/2 tsp garlic powder
1 C rice vinegar
3 T grated fresh ginger
3 T Garlic Chili Paste
3 T chopped green onion
2 T toasted sesame seeds

Place prepared wings in Ziploc bag and pour half of sauce into bag, reserve other 1/2(about 1 cup) Marinate 2 hours or more in the refrigerator.
Spray a foil lined roasting pan with non-stick spray. Lay wings in the pan pour the sauce from Ziploc into pan. Cook at 350 for 40 - 45 minutes on one side basting frequently, flip over and bake/ baste an additional 25 minutes. Turn off oven let sit 10 minutes. Boil remaining sauce 6-8 minutes on high and reduce heat to thicken… pour thickened sauce and sprinkle toasted sesame seeds & serve.


Sunday, October 5, 2008

Pillsbury Pizza Crust Pizza Bites


We were both on a sugar high after a big morning of cinnamon rolls (which oddly turned out to be my FAVORITE experiment so you'll see that LAST...)so we went for the pizza dough...I am super appreciative to receive these products to play around with and create some new ideas and with out turning the next few posts into a long commercial, I am just going to give my review/opinion once (and it's can just be applied to ALL my Pillsbury posts.) While about 90% of the recipes you'll find on this blog are "made from scratch", I very much appreciate yummy time-savers to be used in a pinch. I am fully aware it's not the same as homemade, and that is because it's EASIER and saves a GRIP of time. Nate was not head over heels about the way the dough tasted because we usually make our own and this was a little different... but I feel like for the awesome results you get (especially the calzone) it's a good dough that can save you a TON of time and help to create fabulous, inventive, delicious goodness. We were pleasantly surprised that we really liked the crescent rolls, because we both do not like cinnamon rolls. Our only complaint there was that we ate too many and I don't know if I'll ever look at another cinnamon roll as long as I live. It was full-blown pre-noon sugar shock. The Recipe Creations were fabulous and a little more familiar than the other two...I've worked with the Pillsbury Crescent Rolls many times, and this was something I will totally buy in the store! I made a few different apps with it, but have some dinner ideas I still want to try with this stuff! We both work between 40-60 hours a week and LOVE to entertain, so I will say that I would purchase and use these products (the recipe creations mostly), they really give you more time to relax and enjoy eachother's company vs. having to prep a dough for something for hours....ok, so that's my opinion and now, onward to the FOOD!!


This was fun to work with because it rolls out into a square and is pretty easy cut, reshape and get creative! It has a buttery flavor and these little snacky bites were not really Nate's fave. I thought they were all right, but in the nature of good experimenting, I think I know what I'd change (noted in ITALICS)next time to improve these a bit. The other recipe we attempted with these were some GIANT calzones that Nate created that are out of this world, but more on that later...


NEW! Pillsbury Pizza Crust (1 tube makes about 12-15 pizza bites)

Filling FOR THE PEPPERONI POPPERS
1 container marinara sauce (from the refrigerator section), or about 1 cup of home made sauce if you have it.
Shredded Mozzarella
Pepperoni
Shredded Parmesan cheese

Filling FOR THE PESTO POPPERS
(mix the following together in a bowl)
1 cup Ricotta cheese
1/2 cup garlic pesto
about 1/2 cup shredded mozzarella
1 tsp crushed chili pepper flakes
2 T shredded Parmesan
(keep extra shredded Parmesan on the side for topping)

Pre-heat the oven to 350 & grease a mini muffin tin.
Roll the dough out onto a flour or wax paper covered surface. Cut the dough into 1 1/2 x 1 1/2 inch squares.
For Pepperoni Poppers~
Place the dough into the muffin cups and press down very lightly. Spoon in about 1 T marinara sauce, add a big pinch of Parmesan cheese, top with a pepperoni and top generously with shredded Parmesan. Bake 25 minutes, until crust is golden brown.

For Pesto Poppers-
Place dough into the muffin cups and press down very lightly. Spoon in about 2 T of the pesto cheese mix and top with shredded Parmesan cheese.
Bake 25 minutes, until crust is golden brown.

If the squares are big enough and you want to fold the outside corners inward- or pinch them closed to make little pockets, that is cool too!


Thursday, July 10, 2008

Homemade Lasagna


It definitely can't be something you eat every day, but when we do eat lasagna, it's best when it's made from scratch through and through.

Pasta
We used this recipe from the
Silver Spoon Italian cook book and doubled it~
Nate usually makes it solo with out a recipe- he just knows when it's right!
p.268
Fresh Pasta Dough (Basic Recipe)
1 3/4 c. all purpose flour (plus extra for dusting)
2 eggs lightly beaten
salt
Sift the flour and a pinch of salt into a mound on the counter. Make a well in the center and add the eggs. Using your fingers gradually incorporate the flour then knead about 10 minutes (you can also use a stand mixer with dough hook attachment.
Add a bit of flour if the dough is too soft or a bit of water if the dough is too firm. Shape the dough into a ball and let rest about 15 minutes.
We then broke it into smaller pieces and used the attachment to our stand mixer to roll out the sheets.

Sauce & Meatballs*
Meatballs & Sauce from ALL RECIPES
*This is a good basic foundation for a tomato-based pasta sauce, that you can add spices, etc. to and make it yours...
We use Nate's family recipe- and you gotta marry one of us to get it! (well, not me or Nate of course, but you catch my drift.)

Cheeeeesseee!!
1 large container of ricotta cheese, 1 big block of top-notch mozzarella (cut into 1 or 1/2 inch cubes), and about 2 cups shredded Romano/Parmesan mixed up, and about 1-2 T chopped parsley (fresh or dried) use more if you are using fresh... and 1 egg-
Mix it all together with your hands in a BIG bowl!


Assembly
Once the sauce is finished pull the meatballs out onto a plate with a slotted spoon (we threw some spicy Italian sausage, 1pkg) into the sauce too- so, same for those- on the plate with the meatballs. (let them cool while you roll out the pasta.
Using the pasta roller attachment to a stand mixer, roll out flat sheets of pasta (make each sheet the aprox length and about 1/2 the width of the pan you are baking it in).
Place next to one another on a sheet of floured wax paper, so they overlap a bit- fork together the overlap to make it one sheet.


Cut the meatballs and sausage into slices about 1/4-1/2 inch thick.
In a large bowl mix the ricotta, mozzarella, 1/3 of the Parmesan/Romano, a few pinches of parsley, the egg, and some salt & pepper (we always do this mixin with our hands, but it can be done with a wooden spoon I suppose)
Spray a deep baking dish (we actually have an All Clad pan that is called a lasagna pan- this was the first time I used it correctly, I guess!)with non-stick spray. Add a big spoonful of sauce and spread out thinly over the bottom.
Place the first "sheet" of pasta in the pan.
Spread some sauce out on that layer, then place slices of sausage across the sauce to make a layer, spread some of the cheese mix on top of sausage, then lay another sheet of pasta over that.


Spread a thin layer of sauce and then spread a generous layer of cheese and put the 3rd sheet of pasta on top of that.


Now, another layer of sauce, then place the slices of meatball in a layer and coat with a thin layer of cheese.


Lay the 4th sheet of pasta over that and top with a thick layer of sauce & sprinkle with remaining shredded Romano/Parmesan.


Bake at 375 covered with foil for 35-40 minutes, uncover and bake 20 more minutes.
Let it sit about 10-15 minutes before cutting and serving.


Serving suggestion; I served a small caprese tower with this dish.
Roma tomatoes, fresh basil leaves, olive oil and sliced mozzarella cheese ( make the slices about a centimeter to a centimeter and a half thick and to shape them all pretty, use a 2-inch diameter biscuit cutter if you got it!)Use a little plate and start with a piece of cheese, then a basil leaf, then tomato, basil leaf, cheese, tomato. Drizzle with olive oil, top with a bit of fresh cracked black pepper.

Then we had a lil'spinach leaf salad
Baby spinach leaves, fresh raspberries, slivered almonds & shaved hard aged Parmesan cheese.
Dressing;
Olive oil
Balsamic vinegar
Honey
Salt
Pepper
Dijon Mustard
2 smuhed raspberries
Whisked together

Some how in the midst of serving ourselves and our 4 guests (and being out of my blogging habit), much like the photoless dip in the weenie post- No pics of these two, but wanted to share anyhow!

Wednesday, June 4, 2008

Ally's Awesome Fried Cheese


In case you don't know, there is an AWESOME BLOG called Culinary Infatuation, where Ally makes some pretty delicious recipes that are always drool-tastic! Recently she made "A Different Fried Cheese" and my jaw dropped.

As I've mentioned a zillion times (and will mention a zillion more) I ADORE CHEEEEESE! It's awesome, and I love it. I also love recipes that are super simple, super satisfying and oohhhhsoooodelicious.

This is as pure & simple as it gets.


Wrap a string cheese in an egg roll wrapper (we used Precious Mozzarella, our favorite, and also a jalapeno jack string cheese I grabbed for kicks.)
Lay one string cheese on one egg roll wrapper diagonally so the cheese starts at one corner and ends at the opposite. Roll up like a burrito and seal with water or egg.
Fry in a frying pan using oil (vegetable or olive oil heated to about 350) until golden.

Sunday, March 2, 2008

Jalapeno Bacon Bites


OH BOY!! How on Earth could you ever go wrong, when something is stuffed with cheese then wrapped in bacon, there is just no way I'm not going to love it.
This also gives me the opportunity to pay homage to one of my FAVORITE BLOGS, THE PIONEER WOMAN COOKS. Many of you may be familiar with this absolutely fabulous blog with it's extremely delicious and user-friendly recipes, topped off with some sensational writing and stunning photography. If all those adjectives didn't inspire you to go check it out, these lil bacon wrapped bites of goodness certainly will!

Because I have a pretty busy work schedule (that in no way relates to making anything wrapped in bacon or whisked into soft peaks) I am a HUGE fan of anything that can be made ahead and frozen or refrigerated to bake just prior to serving, that just makes life so much easier!

I made a few lil'changes to the recipe on Rae's site (which is credited to Missy). So visit THIS LINK to see the original.


Jalapeno Bacon Bites
Adapted from The Pioneer Woman Cooks
Serves 30-40

20 Jalapeno peppers
3 8oz packages of softened cream cheese (room temp)
1 cup of shredded cheddar or Cheddar & jalapeno jack cheese
2 packages of regular cut bacon (the thick cut takes longer to bake*
Toothpicks

Wash the jalapenos and dry with paper towel. Cut off the top/stem, split in half long-ways and remove the seeds and membrane (that is the heat of the pepper, leave some of the membrane if you want them hotter). Then cut the halves in half so you've got a little bite sized bite! In a large bowl (using a hand or stand mixer with paddle attachment) mix the cream cheese & shredded cheese. Cut one package of the bacon into even thirds. (you will use about 1/3 of the other pack of bacon, and then you'll have some left for the next day's breakfast!)
Fill each 1/4 of a jalapeno with the cheese mix and wrap with bacon, secure with a toothpick. Don't stuff em too full and don't wrap the bacon super tight- these steps help keep the cheese in there and not squeezed out during baking when the bacon shrinks up a bit.
I made these late on a Friday night before a Saturday afternoon shower, so once wrapped and tooth picked, I put the bites into a large freezer bag & froze them overnight, which is a great option.

Weather baking them fresh or frozen, you'll want to line a baking sheet with foil and place a rack (like a cookie-cooling rack) on top of that, so the grease can get away from the bacon-bites. Bake at 375 for about 25 minutes, if the bacon is still not quite crispy, broil them about 5 minutes and you'll be good to go.
Serve hot or let cool to room temp, either way these are knock-down-drag-out Delicious and I am very much looking forward to making and eating these again very soon!

Thursday, January 24, 2008

Garlic, Cheese & Sausage Bites


Last month I discovered a wonderful blog, SUNITA'S WORLD. I love visiting frequently because of the beautiful pictures and the lovely way she writes. Sunita hosts a monthly event that is a truly terrific idea; it's called THINK SPICE. When I saw that this month's theme was GARLIC, how could I possibly resist!?! Nate and I both LOVE, and I mean LOOOOOOVE garlic. There can never be too much garlic in a dish for us- we even eat it all by itself!! (People at work love that the next day, I'm sure.) I honestly attribute the fact that the two of us do not get sick very often to the amount of garlic we eat.


Of course when the main ingredient is one of your very favorite things coming up with ONE recipe can get a little overwhelming! Fortunately Nate and I brainstormed together and came up with these little guys~
Thank you for hosting a wonderfully creative monthly event that I hope to participate in often. Please visit Sunita's blog- Sunita's World to see all the delicious garlic recipes, and get inspired!


Garlic, Cheese & Sausage Bites
Makes: 24 bites
Source: Me, Beth G, & Nate the garlic genius...

1 8oz block of cream cheese, softened
1 spicy Italian turkey sausage
1 head of garlic + 1 1/2 tsp chopped garlic
Garlic powder
Garlic salt
Black pepper
Red chili flakes
Olive oil
Won Ton Wrappers
Non-stick cooking spray

Preheat the oven to 375. Cut the top off the head of garlic and place it on a baking sheet covered with foil and pour olive oil over it. Bake for 30-40 minutes or until golden brown and cloves are soft & mushy. (this can also be done in the toaster oven :O)
Cut the raw sausage open and throw away the sausage casing, brown the sausage in a skillet until completely cooked.
Chop 1-2 cloves raw garlic, about 1 1/2 tsp.
In a large bowl combine cooked sausage, cream cheese, roasted garlic, raw garlic a pinch of red chili flakes, and seasoning- I just shook in a bit of the garlic powder, garlic salt, & pepper (probably around 1/4 tsp each, maybe a bit more) and mix with a hand held electric mixer until all ingredients are well combined.
Spray a mini-muffin tin with non-stick cooking spray. Add a won-ton wrapper one cup of the muffin tray and fill with about 1 to 1 1/2 Tbsp of the garlic cheese mix. Pinch the won ton wrapper together to seal, then spray with non-stick cooking spray, repeat until the whole tin is full of lil' garlic bites!
Bake at 375 for about 30 minutes or until they are golden brown and gorgeous!
The tops will open up a bit- but I thought they were reminiscent of little garlic cloves and was happy with how they came out.
They need a bad ass dip of some sort but I ran out of time Thursday evening and the nagging cold I've had all week finally forced me to give up and head to bed :)


Saturday, December 29, 2007

Tuna Tartar


With Christmas behind us and the apartment actually clean, I thought it would be a perfect time to have a little dinner-party and invite some friends over to try some of my new recipes.

I decided to make prime rib as our main course because I have never made it before and with the cold weather it sounded yummy. Since the main dish was such a hefty one, I thought it would be good to start with something a bit lighter.
I headed over to Nijiya Market, which is walking distance from our old casa, and just a short drive from our current casa here in Culver City...Mitsuwa is another good market for sushi fish and other delicious treats in our area. If you are not near a fabulous Japanese market, roll over to Whole Foods, Gelson's, Bristol Farms or another local spot that has SUSHI GRADE FISH. That is the only type of fish that should be used for this recipe. Also,make sure your kitchen and hands are clean, and I keep a little bowl of rice vinegar mixed with water and a clean kitchen towel on hand to wipe things down (knife, etc.) and keep it clean while working with the raw fish.


Tuna Tartar
By: ME, Beth G
Serves 4-8 (8 mini, 4 "regular"- like a normal can of tuna size, 6 perfect-size- like the lil can of tuna with the pull tap) :)

About 1 lb SUSHI GRADE tuna, chopped to bits
1 large ripe avocado
1-2 T fresh lemon juice
1 1/2 tsp prepared wasabi
2-3 tsp chili sauce (siracha is recommended, but the store was out of it, so I used the Lee Kum Garlic Chili sauce)
Kosher salt
1/2 tsp soy sauce
2-3 green onions finely chopped
sliced pickled ginger and sesame seeds to garnish

Place the chopped tuna in a medium bowl. Cut the avocado in half, put one half away for future use- cube the other half and toss in with the tuna in the bowl. Stir in lemon juice, wasabi, chili sauce, a pinch of salt, soy sauce & green onions. Cover and refrigerate for at least 1 hour.

Remove marinated mix from the fridge. Cube up remaining half of avocado. Mold tartar into little circles using a cookie cutter, cleaned tuna can, or (as I did) the top of a disposable cup with the bottom cut off. Top with avocado, a little ginger and sesame seeds.