Showing posts with label Freezer. Show all posts

Sunday, August 25, 2013

Crock pot BBQ Garlic Chicken


Call me crazy, but I feel like loading up on garlic is one of the mainstays of our "stay-healthy" routine around here. I usually kick it up an extra notch or 10 right before we travel, must be a blast to work out next to me this week.
Here is one that came, as usual, from what we had and an extreme lack of time or planning. So much so, all I have is the blurry photo above from the day after we had it for dinner on potato bread as my quick lunch while getting ready for our trip! Sorry bout that guys!!

Here is what you will need:

1 package boneless skinless chicken breasts
about 1 1/2 cup bbq sauce
8-10 cloves of garlic (I used a whole head, c'mon!)- peeled and cut in half or crushed a bit
about 1/2 a cup water or broth (veggie or chicken)
salt, paprika, garlic powder

Put chicken and garlic in crock pot
add about 3/4-1 cup bbq sauce (cover top of chicken)
Pour water or broth in on the side, not over the bbq sauce chicken
Low for 4 hours or until chicken is cooked through & shreds eaisily- mine was done-da-da at 4 hours but well done, I probably could have finished it off at 3:30 or 3:45.

Transfer chicken to bowl, use a slotted spoon to transfer the garlic as well.
shred chicken using two forks
Sprinkle on about 1 tsp paprika, and 2-3tsp garlic powder
add 1/4-1/2 cup bbq sauce
use forks to mix well
taste, then add salt if needed

What you do with this garlic gloriousness is up to you! Top a salad? Roll in a tortilla? Stuff a yummy Hawaiian roll or pita pocket?  (or on potato bread for a blurry sandwich photo, perhaps??) lol.


Monday, June 24, 2013

Awesome Crock Pot Chicken Enchiladas


Wow, these were EASY and soooooo delicious! A while ago my sister told me I had to go get the Salsa Verde from Trader Joe's and mix it with Greek yogurt- then put it on everything, because it's awesome. The time finally came this past weekend, I tried it, and I'm hooked.
This is a perfect summer crock pot recipe that I will definitely make again and again, it's relatively inexpensive and could not be any easier.


Here's what you need:

1 package boneless skinless chicken breasts
1 package whole wheat tortillas
2 jars Trader Joe's salsa verde
1 container Greek yogurt (you will use about a cup)
3/4 a sweet onion diced
2 cups shredded cheese

Lightly spray the inside of the crock pot with olive oil to help prevent sticking. Scatter a small handful of onions across the bottom, place chicken on top of onions, pour about 2/3 of one of the jars of salsa over the top of the chicken. Cook on low about 4-6 hours or until completely cooked through and easily shreddable.
Remove chicken from crock pot, discard liquid.
Place chicken in a large bowl and use two forks to shred it up, let it cool a bit, then add 1 cup Greek yogurt and the remaining salsa in the first jar, use forks to combine well. (I did this on Sunday, then put the chicken mix in the fridge and did all the steps below for dinner Monday)

Preheat oven to 375
(for a freezer meal, follow the steps below, except baking, cover, freeze and bake for about 45 minutes at 375 from frozen when ready)
Line a 9x13 baking dish with foil
Lay a tortilla on a plate and scoop about 3 forkfuls of chicken mix onto the tortilla, top with a half of a handful of onions, 1 T of salsa and wrap shut- place in pan seam side down, repeat until you are out of chicken or the pan is full.
Pour salsa from the 2nd jar generously over the tortillas, top with lots of shredded cheddar cheese, reserve a bit to mix with the greek yogurt for after baking.

Bake 20-25 minutes or until cheese is all melted and bubbly.

Serve with a dollop of the Greek yogurt/salsa sauce, avocado, black beans and rice!

Tuesday, November 6, 2012

Mushroom, spinach, cheese & herb roll-ups


My friend Zarah makes the most kick ass mushroom & herb tart- the filling is earthy, herby, cheesy and amazing all packed in a gorgeous, flaky, delicious puff pastry. Once you taste it, you'll CRAVE it. I plan on making it soon- because it a go-to at this time of year, especially since it's an excellent freezer-meal that you can easily make 2 or 4 of and freeze the ones you don't have for dinner that night....this post, is not that post, yet. Sorry. I know, I got you drooling, and said "puff pastry" and that's just not what I'm about to break down for you. BUT, this post is awesome, and easy, and delicious and my 1 year old LOVED it. (promise, the shifty look is deep enjoyment, he's thrilled, trust me.)


The filling is inspired by Zarah's goodness, with a few additions to use up things I had and make it a one-stop-dinner- so full of veggies, no side dishes were needed. I'm busy, ok.


What you need:
6-8 baby Bella caps
3-4 shiitake mushrooms
8oz cream cheese
3-4 cloves garlic minced
2 handfuls fresh spinach chopped
Butter, olive oil
Fresh thyme & rosemary
Lasagna pasta sheets, dry
Either Greek yogurt or kale yogurt dip (see photo below)
Parmesan cheese
Salt & peppa

Start a large pot of water boiling on the stove, I think I used about 6-8 cups water.
Add 1 T butter &1T olive oil to skillet remove leaves from 6 stems of thyme then trow about 6-8 whole intact stems in- add 3 sprigs rosemary one w leaves removed from stem- let simmer on low for 5 minutes. Add garlic, simmer another 5 minutes on low.
Add mushrooms turn heat to medium, stir, cook about 6-8 minutes.
Turn heat back to low, remove intact sprigs of herbs, add spinach then cheese, stir until melted & all well mixed. Add salt and pepper to taste.
When water boils add sheets a few at a time- tend to them so they dot stick to each other- I used plastic tongs to get sheets out & onto wax paper one at a time to cool- boil until tender but aldente about 6 minutes.
When the pasta is cool enough to touch and the filling is finished, spread a thin layer of the filling into each pasta sheet, roll, place in baking dish.


Top with dip or plain yogurt- sprinkle w Parm. Bake 400 for 30min.


I made one with the plain yogurt option in the toaster oven and Logan and I taste-tested it- totally delicious, just so ya know I'm keeping it real with you ;)

I rolled em all up, put them in the pan- then they stayed in the fridge till after the dogs were walked, and all kinds of other business was attended to- then topped with dip, parm and baked for dinner! This would be a good freezer meal too-I'd definitely going to double batch and freeze a pan the next time I make this.

This recipe was DEEEEELICIOUS, huge thanks to Zarah for being an inspiration (in so many ways!) 


Friday, May 11, 2012

Enchiladas (..and enchilada pies) & Fiesta Rice


This is one of my favorite freezer meals- homemade, easy and really freezes beautifully!
You'll never buy "enchilada sauce" again- this is so delicious!!
Of course I got a little busy with my active wild-man Logan and made this for Thursday night's dinner- which is my "go-to-Bar-Method-and-get-my-butt-kicked" night (daddy does bedtime solo every Thursday so I can have this much appreciated me-time, he's awesome)- and I didn't get a photo of the enchiladas! HA!
After said Bar Method class, I got home, ravenous and ate..... Oops. Sorry folks. Mama was HUNGRY.


I did make a pan to give to my friend Kristen, because she is another amazing Bar Method Mama and I had to do something to thank her for the priceless advice, guidance, baby gear and gloriousness she has brought into our lives.
This recipe is great because it can feed a big family, or sever small families like mine & Kristen's, or make several freezer meals- which I loooooove.
Kristen was so sweet to post this pic on FB so at least you get SOMETHING- haha!


I was initially inspired by THIS recipe via Food Network by Emeril Lagasse- but changed it to make it easier for me to make.

Here's what you'll need:
This will make 14-16 enchiladas OR 10 enchiladas and 4 enchilada pie's (oh, ya, I owe you an explanation of that top photo!!...it's coming...)

Enchiladas
1 15oz can of tomato puree OR crushed tomatoes
1/4 cup New Mexico Chili Powder*
3 T olive oil
1 T whole wheat flour
16 oz chicken or veggie broth
1 heaping tsp dried oregano
1/2 heaping tsp cumin
salt

10-16 tortillas- traditionally corn tortillas are used- I used whole wheat flour tortillas from Trader Joes- which are delicious in this recipe- or get crazy and make YOUR OWN (click here)
1 small onion, chopped
2 cooked chickens - shredded (I get mine from this amazing Peruvian rotisserie place on Venice that takes these to the next level- but just grab two hot chickens from the grocery and shred in your mixer while they are still warm- SO EASY)
4 cups shredded cheese- a mix is best- pepper jack, cheddar, etc.- 3 cups go in the filling the 4th is to top em & garnish
1 8oz package low fat cream cheese- at room temp
5 green onions, chopped (for garnish)
Sour cream or fat free Greek yogurt (for garnish)
(disposable pot pie containers from the baking aisle if you want to make the enchilada pies!)

Make the sauce:
In a saucepan, heat the oil over medium heat, add flour and whisk for about a minute. Add chili powder and stir another 30 seconds.Stir in broth, puree (or crushed) tomatoes, oregano, cumin- bring to a boil.
Reduce heat, simmer 15 minutes.

Make the filling:
While the sauce simmers, in a large bowl, mix the chicken, onion and cheeses.

Assemble the enchiladas or pies-
If you are using corn tortillas or if your tortillas are a little on the hard side then soften them by microwaving 20 seconds on a plate stacked with moistened sheets of paper towel between each tortilla. you don't want them hot, just soft and easy to roll around the filling.
Pre heat the oven to 350
Add a few spoonfuls of sauce to the bottom of a baking dish & spread to make a thin, even layer.
Lay a tortilla on a plate and add a few scoops of the chicken mixture in the center- roll like a burrito (with open ends though- just roll it)
Place stuffed enchilada seam-side down in the baking dish- repeat until the pan is full- do this in a 9 x 13- or several 8 x 8s
Top liberally with enchilada sauce and shredded cheese.
Wrap with press n seal and freeze for another night or cook for 30 minutes and enjoy!

For the "pies" (photo at the top of the post)
Add a big spoonful of the sauce to the bottom of each pie foil.
Press one tortilla down into the little pie foil (you have to use full "burrito size" tortillas for this)
Fill with 3 big spoonfuls of the chicken mix.
Fold the corners/sides of the tortilla into the center (there will be a space in the middle where they will not meet up) cover with more sauce and shredded cheese- freeze or cook as noted above & enjoy!

For frozen enchiladas bake at 375 for 30-40 minutes (until hot all the way through)

*You may or may not know in the grocery store there is a whole OTHER section where they sell spices! Not located on the baking aisle- usually near the beans, or ranch/dressing mixes there is a section of spices in plastic baggies- not jars- and they are WAY less expensive (hopefully your market has this!!) Always a great go-to for cinnamon, garlic & onion powder, paprika etc- and in my store that was the only place they had specific "New Mexico" chili powder! If you don't have that section or want to just use the regular chili powder you have on hand- that's all good


Rice
2 cups brown rice
3 cups chicken broth, veggie broth or water
1 can pinto beans drained rinsed
1 can fire roasted tomatoes w green chilies, drained, as much liquid as possible pressed out w paper towel
5 green onions chopped
2 bell peppers (any color), chopped
1 jalapeno, membrane and seeds removed, chopped
salt & pepper
Hot sauce

Prepare rice and let cool
In a large bowl toss in the onions, beans, bell peppers, jalapeno and tomatoes- stir until all are well combined.
Add salt & pepper & hot sauce to taste.
You can warm it up in a sauce pot or make it ahead (my favorite method) and refrigerate an hour or so- the flavors really combine well that way- it's also good cold, perfect for summer/ 4th of July picnics and BBQs!!

Wednesday, May 2, 2012

Carnitas Cornbread Pie


There's nothing better than using leftovers to make a fabulous freezer meal so when you need it, there will be a whole day of not doing a thing about dinner till you have to pop it in the oven and set the table.

We got a HUGE pork loin on super sale and Nate cut it into 3 pieces so we could freeze 2 and use the one we needed that day for our Root Beer Pulled Pork.

A few weeks later I still had the two tenderloins in the freezer and decided to use both of them to make a big batch of Crockpot Carnitas.
This was awesome because then I had tacos for Monday & Tuesday- and plenty leftover to make this recipe of two pies- we ate one of the pies Wednesday & Thursday night and the other went in the freezer!
This was a recipe I made up, with Nate's help, on a recent freeway drive.

You will need 1/2 of the carnitas from the above recipe to make 2 pies.

Each pie is 4-6 servings.
Meaning, it should be 6 servings but it's really good, you're gonna pile it on, and it will really only be 4...

Here is what else you will need:
Cooked, shredded, cooled carnitas
2 green chilies (I had Anehiem on hand, use any mild to medium green chile)
2 cups salsa verde
3-4 green onions chopped 
1 large jalepeno chopped
1 cup corn meal
1 cup flour
1/4 cup sugar
2 1/2 tsp baking powder
1 tsp salt
1 egg
1 cup milk
1/3 cup vegetable oil
Shredded cheese about 3 cups


Spread a layer of salsa verde at the bottom of each pan.
Add a layer of carnitas.
Add the diced green chilies & more salsa verde.
Then make the cornbread layer;

In a medium bowl whisk together the cornmeal, flour, sugar, baking powder and salt.
Using a hand mixer, blend in the egg, then milk then oil- until each ingredient is incorporated.


Pour the cornbread mix over the carnitas- sprinkle the chopped green onion and jalapeno over the cornbread.


Top with cheese.....

At this point I made one of them for dinner and froze the other for two weeks from now- cover in press n seal then into a ziplock freezer bag. (just add about 20 minutes to cooking time for the frozen pie).


For the "straight into the oven" pie- cook for 25 minutes or until golden brown and you can insert a butter knife in to the cornbread layer that comes out clean.

This was really, really, really yummy- great way to maximize a fantastic crockpot recipe!! Enjoy!! 

* for a veggie option; make the bottom layer with black beans or meatless-meat seasoned with chipotle peppers and adobo seasoning and add more chilies/veggies!!

Thursday, March 8, 2012

Easy Weeknight Dinner- TACO Stuffed Shells


I know this; I love stuffed shells, and I love anything taco-esque...so why not get those two concepts hitched up into a delicious, easy weeknight dinner that is a total crowd-pleaser!?!

As much as I wish this idea was my own, I always prefer to give credit where due- and this innovative yumminess comes from the Building Food Storage Blog (click the link for original recipe and photos).

This is my version of that awesome dish- I've had a husband and 6-month old battling the flu over here this week so I didn't have a moment to check the recipe and had to go from memory of seeing it once and using the ingredients I had here. That alone should give you a concept of how EASY this is to make.
Wha'bam.

What you'll need to make Taco Stuffed Shells:

1 lb lean ground turkey (you can also use beef, of course or a substitute of Veggie Taco Meat * if you are vegetarian or making this dish for a Lenten Friday dinner)
1 15oz can black beans, drained & rinsed
1/2 a yellow onion, chopped
1 small jalapeno, finely chopped**
1/2 a red bell, finely chopped**
8 oz Neufchatel Cheese (this is the 1/3 less fat "cream cheese"- if you read the package on the Philly brand, or buy generic, you'll see it's actually Neufchatel- go figure!)
1 box of large pasta shells
1 can of large olives, drained & sliced (or buy em sliced to save more time!)
4 chopped green onions
a few handfuls of shredded cheddar or jalapeno jack cheese
Taco Seasoning***
Sour cream or Greek yogurt, avocado and a little extra chopped green onion for garnish
A jar of salsa- or about 1-2 cups fresh salsa
hot sauce

*you can skip the taco seasoning step and also choose yay or nay on the additional veggies if you make the vegetarian taco meat recipe above...
**the jalapeno and bell pepper are completely optional, I threw em in because I had them in the fridge and didn't want them to go to waste...
***You can ALWAYS just buy the packet from the store or follow the instructions on THIS LINK to make your own. I eyeballed a combo of  chili powder, garlic powder, onion powder, cumin, sea salt & black pepper to taste.


In a large skillet cook the ground meat thoroughly, add the seasoning as the meat cooks, or according to package directions, if using a packet. (if you use extra lean meat you shouldn't have to drain the meat after cooking- especially if you go the turkey route)
Add the onion, beans, jalapeno & bell pepper and stir over medium heat about 3-5 minutes.
Meanwhile start a large sauce pot full of water boiling on another burner for the shells.
Add the Neufchatel or cream cheese to the meat skillet, reduce heat to low and stir until cheese melts in.
Remove the skillet from the heat and set aside to cool.
Boil the shells according to package directions- about 9-12 minutes, you want them to be "aldente" because they will finish cooking once filled & baked.
Reserve 1/2 cup of the starchy pasta water- set aside. (skip if prepping a freezer meal- see below)
Drain the shells and spread out on a sheet of wax paper to cool- so they don't cool all nestled into one another and stick together.
Pre heat the oven to 375
Line a 9 x 13 baking dish with foil.
Pour a little of the pasta water in the bottom of the baking dish- just enough so the bottom is covered completely in a VERY THIN layer of the water. (again, skip if freezing- see below)
Dot the bottom of the pan with salsa.
Use a wooden spoon or your clean hands to stuff each shell with the meat/bean mix and line them up in the pan until you've used all the filling.
Pour salsa over the stuffed shells in the pan.
Sprinkle the shells with shredded cheddar or jalapeno jack cheese.
Sprinkle the cheese covered shells with green onion.
Bake for 30 minutes.
Top with sliced olives, sour cream (or non fat Greek yogurt), green onions, avocado and hot sauce.

FOR A FREEZER-MEAL VERSION- COOK THE SHELLS 1 MINUTE LONGER, OMIT THE PASTA-WATER STEPS AND STOP AT THE "POUR SALSA OVER THE STUFFED SHELLS IN THE PAN" STEP.
COVER THE PAN WITH FREEZER PRESS N' SEAL AND THEN FOIL & FREEZE.
WHEN READY TO MAKE- REMOVE PRESS N' SEAL, COVER WITH FOIL AND BAKE ON 400 FOR 30 MINUTES- REMOVE FOIL- SPRINKLE CHEESE & GREEN ONION, BAKE AN ADDITIONAL 15 MINUTES.

Friday, February 24, 2012

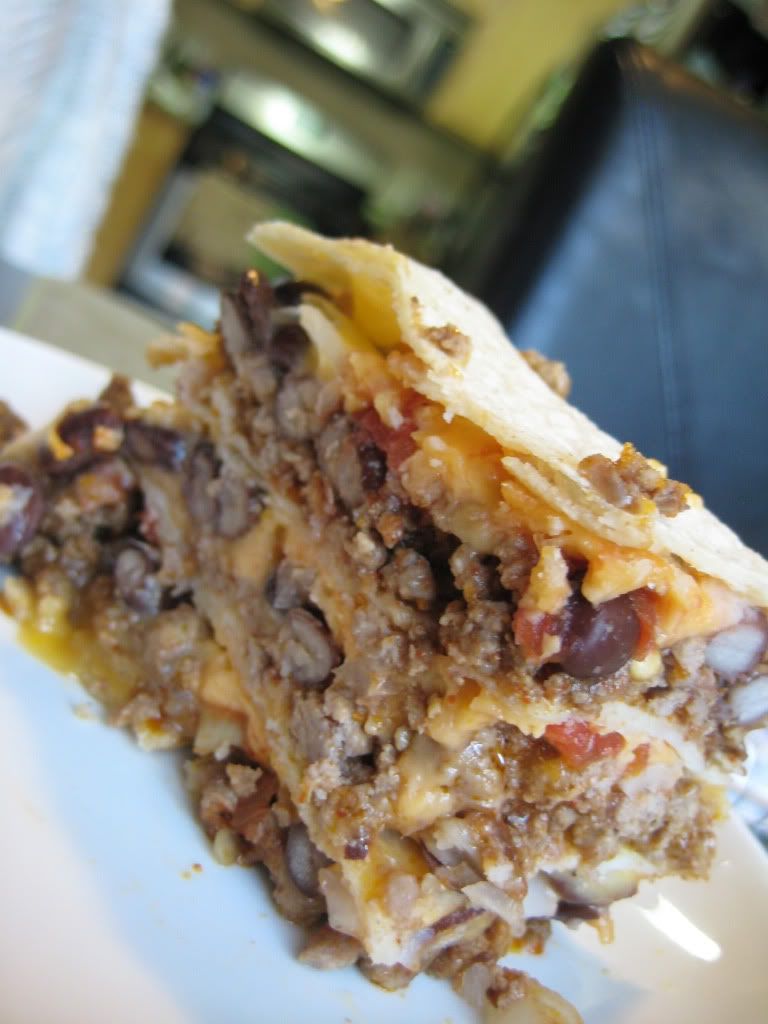
Easy Weeknight Dinner- Taco Casserole


Easy weeknight dinners are awesome, so is anything that gives you more personal time to spend with your family (or with yourself!!)
I'm also a HUGE fan of dinners that last more than just one night. This is one of those, easy and leftover-delicious. I made this on a Sunday then Monday when we got home from a long day just a little reheating and dinner was ready!!


Brown 1 lb ground beef or turkey in a skillet over medium-high heat
Season with taco seasoning- you can use a packet from the store or make your own!! (click HERE for lots of great make your own seasoning recipes),
I also added a few dashes of hot sauce- when meat is cooked all the way, remove from heat and let cool a bit.
Spray a casserole dish with non-stick cooking spray
I used soft taco sized corn tortillas (the corningwear is about an inch bigger than the tortilla all the way around- which works)
Put a tortilla in the corning wear
Then sprinkle on a thin layer of shred cheese, spoon on 1/3 of the meat, add some drained, rinsed canned black beans, a little handful of chopped tomato and spoon some chunky salsa over that- then more cheese.
New tortilla, repeat- cheese, meat, beans, onions, salsa, cheese- tortilla
Repeat layers
Tortilla on top
Bake at 350 for about 25 minutes.
Serve w sour cream and avocado n hot sauce.

This also makes a great freezer meal- right before the "bake at 350" step you can cover the casserole dish in freezer Press n' Seal, then add the lid and freeze- just add 10-15 minutes to the cooking time when cooking from frozen- and for goodness sake, remember to remove the press n seal before you put the frozen dish in the oven! 

Wednesday, January 21, 2009

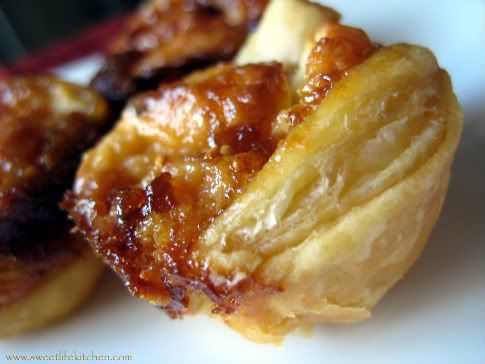
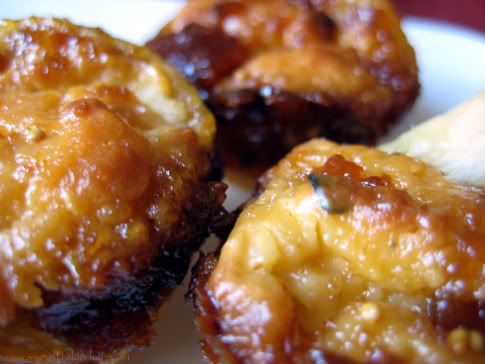
Goat Cheese Bites


I made a variation of these last year for our holiday sweater party and think that you pretty much can't miss with fig & goat cheese!
These are a simple and beautiful appetizer that freezes well and can be made ahead, and heated up as the party moves along! I love the fig preserves at the holidays- but these are great with marmalade or other preserves to reflect different seasons.


Makes 60-70
12 oz goat cheese
8 oz softened cream cheese
one egg
3 boxes of frozen puff pastry
2 jars of fig preserves

Let the puff pastry thaw on the counter. Using a hand mixer combine the goat cheese, cream cheese & egg. Using a small biscuit cutter (about the size of a silver dollar) cut circles out of the puff pastry sheets...place a circle of puff pastry in a greased mini-muffin tin, add a scoop of cheese mix, top with a dollop of fig preserves. Bake at 350 for about 25 minutes or until cheese and puff pastry is golden.
You can freeze these and then just re-heat them at party time! :O)

Tuesday, February 26, 2008

Tuesdays With Dorie~Pecan Sour Cream Biscuits


WHEW!!! I almost didn't make it this week, but the recipe really sounded way too good to miss out on. I came runnin' home from work Monday night and in the wink of an eye I had some fabulously delicious biscuits on my kitchen table, posing for their close up!! I'd like to shout-out a SUPER HUGE THANKS to ASHLEY over at eat me, delicious for choosing an EXCELLENT recipe for this weeks edition of TUESDAYS WITH DORIE*. I hosted a shower with my mom this weekend so my cookin' time was pretty spent and I nearly missed out on participating this week. Thankfully Erin picked a spectacular recipe that did not take too much prep time, and I was able to come home and make biscuits before Nate arrived home from work! I have been dying to make some biscuits for quite a while. My friend Lisa got me a fabulous gift this Christmas, a subscription to both Gourmet and Bon Appetite magazines!! The first issue I received was all about delicious Southern goodness. I thought about making biscuits, because they had some great recipes and Nate and I are both big biscuit fans. As of this week I had still not come around to making any of those recipes- so I gave this one a whirl, and it ROCKS!!


Another grand thing about this recipe is that you can make the dough, cut the biscuits, then they can be stored in the freezer for up to 2 months! Awesome!!!
I didn't have a biscuit cutter so I used a wine glass, then I thought I'd make some mini biscuits too! They were spectacular, I am a HUGE fan of this recipe!!


Pecan Sour Cream Biscuits
(Makes about 12 biscuits)
Dorie Greenspan's Baking; From My Home to Yours

2 cups all-purpose flour (or 1 3/4 cups all-purpose flour and 1/3 cup cake flour)
1 tablespoon baking powder
1/2 teaspoon salt
1/4 teaspoon baking soda
1/4 cup (packed) light brown sugar
5 tablespoons cold unsalted butter, cut into 10 pieces
1/2 cup cold sour cream
1/4 cold whole milk I used non-fat
1/3 cup finely chopped pecans, preferably toasted

Getting Ready: Center a rack in the oven and preheat the oven to 425 degrees F. Get out a sharp 2-inch-diameter biscuit cutter and line a baking sheet with parchment or a silicone mat.

Whisk the flour(s), baking powder, salt, and baking soda together in a bowl. Stir in the brown sugar, making certain there are no lumps. Drop in the butter and, using your fingers, toss to coat the pieces of butter with flour. Quickly, working with your fingertips (my favorite method) or a pastry blender, cut and rub the butter into the dry ingredients until the mixture is pebbly. You'll have pea-size pieces, pieces the size of oatmeal flakes and pieces the size of everything in between-- and that's just right.

Stir the sour cream and milk together and pour over the dry ingredients. Grab a fork and gently toss and turn the ingredients together until you've got a nice soft dough. Now reach into the bowl with your hands and give the dough a quick gentle kneading-- 3 or 4 turns should be just enough to bring everything together. Toss in the pecans and knead 2 to 3 times to incorporate them.

Lightly dust a work surface with flour and turn out the dough. Dust the top of the dough very lightly with flour, pat the dough out with your hands or toll it with a pin until it is about 1/2 inch high. Don't worry if the dough isn't completely even-- a quick, light touch is more important than accuracy.
Use the biscuit cutter to cut out as many biscuits as you can. Try to cut the biscuits close to one another so you get the most you can out of the first round. By hand or with a small spatula, transfer the biscuits to the baking sheet.

Gather together the scraps, working with them as little as possible, pat out to a 1/2-inch thickness and cut as many additional biscuits as you can; transfer these to the sheet. (The biscuits ca be made to this point and frozen on the baking sheet, then wrapped airtight and kept for up to 2 months. Bake without defrosting-- just add a couple more minutes to the oven time.)

Bake the biscuits for 14-18 minutes, or until they are tall, puffed and golden brown. Transfer them to a serving basket.

Thursday, December 13, 2007

It's FREEZING in here!! Freezing Cookie Dough...


Well, it really has been quite cold (as we Southern Californians say, it's been in the dangerously low 60s!!) Seriously though, last night was in the 40s and the heater in our apartment has been on the fritz for over a month now so we've been wearing extra layers and even socks to bed!
Every year I look forward to doing my holiday baking, my family is scattered all over America, from Columbus, to Denver, to Portland, to Atlanta...and I like to ship them all the plate of cookies I wish I could just walk over and hand out.

This year I am making and shipping most of my usual goodies;
A jar of Mocha Mix
Chocolate covered cinnamon hazelnut biscotti
Peanut Butter Blossoms
Ginger cookies
Lemon cream cheese thumb-prints with apricot and raspberry preserves

Because my schedule is TIGHT and we are hosting a holiday party here on the 15th (and my kitchen is teeny-weenie) I needed to make my dough ahead and freeze it for as much of the above as possible.

Not all dough is able to do this, but for the PB Blossoms, Thumb prints and Ginger cookies this is what I did.
Read more tips on freezing HERE or HERE

Here are the "supplies" you will need.


A clean odor-free freezer is #1, I cleaned out mine and added 2 Arm n Hammer Baking Powder Fridge and Freezer deodorizers one week before freezing my dough.


Saran wrap
Glad press & seal
1-gallon sized freezer bags
A sharpie marker to label & date the bags
(the Glad-ware pictured was used to ship the cookies :)

First make a single or double batch of the dough you wish to freeze.
If it is a double batch divide it in half and make 2 balls


Place 2 pieces of saran wrap forming a + on a clean flat surface.
Place the loaf-shaped ball of dough on the saran. Fold the top and bottom pieces in and wrap the side pieces around (kind of like wrapping up a burrito).
Repeat this exact process with the Press N' Seal. You can double zip lock bag it at this point if you'd like, single is usually fine.


Label the bag with type of dough and date.

Place wrapped up dough in bag and freeze for future use.


The night before baking with the frozen dough, move it into the refrigerator and thaw by refrigerating for about 12 hours or until thawed all the way through.

Follow baking instructions for each cookie individually.