Friday, August 7, 2009

Blueberry Chocolate Chip Muffins

Photobucket

Ok, there has been many a dinner recipe here lately, so I thought I'd mix it up, and sweeten it up a bit! This is a light and almost cake-y muffin that has a very mild flavor so it is really all about the blueberries! I added just a small handful of the chocolate chips for fun, but not too many so they took over the blueberry-yumminess. I think these would also be excellent with the addition of a bit of lemon or orange zest~

Photobucket

Makes 12 giant, 18 medium muffins

1 C. Milk
1 egg
1/3 c veg oil
2 cups flour
2 tsp baking powder
1/2 c sugar
1 T. brown sugar
small pinch of salt
1/2 cup fresh blueberries
1/4 cup/ one good sized handful mini chocolate chips
slivered almonds to sprinkle on top

Pre-heat oven to 400 and line a muffin tin with paper liners.
In a medium bowl sift the flour, baking powder and salt-set aside.
In a large bowl, blend the egg, oil and milk until mixed.
Add the sugars and mix for 10 seconds
Using a spoon or spatula slowly stir in the dry ingredients, but don't over-mix, just get all dry ingredients incorporated into milk/egg/oil/sugar mix.
Fill muffin cups about half full and bake for 20-25 minutes.
Let cool 5 minutes in the tin and sprinkle with raw almonds then move muffins to a cooling rack.

I love blueberries with honey, and these are very mildly flavored muffins, so you get a lot of blueberry goodness- I put some butter and honey on these and LOOOOVED it~

Photobucket

Tuesday, August 4, 2009

Dry-Rub Grilled Ribs & Homemade BBQ Sauce

Photobucket

I've been DYING to BBQ. We use our grill all the time, but I wanted to make something that would be messy, delicious and super-bbq-y! Nate and I were in Huntington Beach so we decided to stop at Plowboy's. Seriously, if you live with in a reasonable distance to Plowboy's- get over there ASAP!! Amazing produce at great prices and the best butcher ever. We did not go in with a plan, other than my plan to get a sky-high samich at the deli. As we walked along the long meat cases we tossed some ideas around, but in the end the ribs looked too good to resist.
When we got home I gathered up the dry ingredients to make a yummy rub and learned all about preppin the pork. (read below). This was not too difficult and was WAY BEYOND delicious.

Photobucket

Sweet Life Dry-Rub Grilled Ribs & Homemade BBQ Sauce
serves 2-4 (depends on your hunger level, Nate is a whole rack man on this one)

2 full racks of pork baby back ribs

Dry Rub~
6 T brown sugar
2 T paprika
5 tsp kosher salt
2 tsp salish (smoke) salt
2 tsp garlic powder
1/2 tsp cinnamon
1/2 tsp cayenne
5-6 twists of cracked black pepper


Homemade BBQ Sauce
2 T butter
2 slice (just under an inch thick) of sweet white onion, finely chopped
1 12oz can tomato paste
3 tsp mustard
6 T white vinegar
2 T Worcestershire sauce
4 T molasses
2 T DRY RUB mixture
6 T water
2 T brown sugar

Photobucket


Removing the membrane~ ok, don't freak out. I know you may be reading that thinking W T F? Well it's really no big deal, and if you remember while @ the butcher, I reckon you can just directly ask to have it pulled right off, right there. In any event if you buy the ribs, get home, whip up a dry rub and then read about said membrane that you never realized existed, then here's what you do....I watched this video on YouTube courtesy of BarbequeWeb.com, and it was pretty easy to do! CLICK HERE TO WATCH

There...that wasn't so bad, was it? OK, now I just set the ribs aside on the paper that the butcher wrapped them up in bony side down. In a medium bowl mix the rub ingredients with a fork and set aside 2 tablespoons to use in the sauce.
Using your hands work the rub over every inch of ribage.
Wrap them back up in the paper and refrigerate 2 hours to all day.

Now, make the sauce!
In a medium sauce pan over low heat combine all ingredients and stir until everything is mixed in. Pour into a jar or other sealed container and refrigerate until it's time for ribs (this will really get the flavors well-combined)

Heat the grill to medium-low (about 300-325 degrees). Place the ribs, bony side down on the pre-heated grill, close the lid and let the magic happen. That's all you need to do to those. Grill them at about 300-325 degrees for 2-2 1/2 hours.

Take those smokin' delicious ribs off the grill and let them rest on a cutting board for about 7 minutes.
Mop them with sauce, cut them if you would like to and get a big pile of napkins, because you're gonna need em.

Photobucket

Thursday, July 30, 2009

Grilled Garlic Burgers

Photobucket

You really can never have too much of a good thing. We'd purchased some garlicy Jalapeno Mustard at last weekends Garlic Festival, and I'd been craving burgers all week. This would most def work with fresh chopped garlic, but sometimes after a extra long day of work, you just don't feel like choppin', ya know? I keep Christopher Ranch chopped garlic (from GILROY!) in my fridge at all time, it was fun to see their big presence at the festival. Being way too tuckerd out to get too crazy in the kitchen, we used what we had on hand and made a super delicious, garlic-tastic burger.

Photobucket

4 Garlic Burgers~
1 lb ground beef
2-3 T minced garlic
1 T Jalapeno Garlic Mustard (or go with a spicy deli mustard)
Fresh cracked black pepper
Garlic Salt
Kosher salt
Sharp Cheddar cheese (that's what we had on hand- I would also recommend this with a pepper jack or any garlic-cheese you may run into!)
More mustard & some red onion for the bun
BUNS

Mix all of the above in a medium bowl while you heat the grill (med-high heat).
Form the mix into 4 patties and put em on the grill. We used Nate's 4 flips/no squeezin method (this makes ULTRA JUICY burgers). Grill them 5 minutes after you put them down, then flip and grill 4 minutes on the other side, flip again and grill 2 minutes, flip one more time and grill 1-2 minutes.Do not use the spatula to PRESS down on the burgers at any point while grilling, just flip em gently. Turn the heat off, add sliced cheese, put the lid on for about a minute until cheese gets a little melty.
Serve on toasted buns with some spicy mustard and thin sliced red onion, if you have some time this is a simple GARLIC AIOLI that would be brilliant, or just stir 1 T of the chopped garlic into 2 T of mayo before mixing the meat and refrigerate and use that spread on the bottom bun.

Photobucket

Monday, July 27, 2009

Garlic Festival in Gilroy, CA

Photobucket

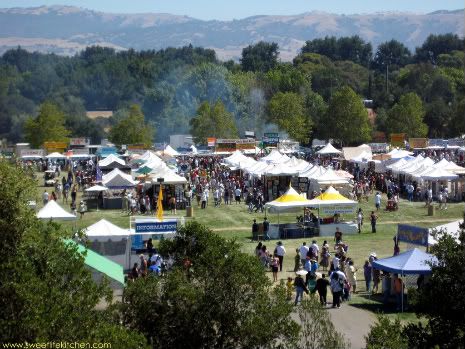
If you are like me, you looooove watching the Food Network, it's an obsession (obviously). A few years ago I caught a special about Food Festivals, it was a countdown-style show and all lead up to their #1 pick, the Annual Garlic Festival in Gilroy, CA.

Gilroy is not exactly Los Angeles adjacent, but it is easily a no-airplane-required trip. I have been talking about going to this festival "someday" for a few years now (since learning of the it's glorious garlicy existence). Last year we were lucky enough to attend the Portland Brewers Festival, but it was the same weekend as the Garlic Festival, so no go in 2008....

Then as spring got hot and summery, I got an email inviting us to Morgan Hill, CA for a dear friend's 40th b-day. Now this friend LIVES in Portland, OR- so I started looking at flights, then my co-worker actually READ the evite and the road-trip planning was in full swing. I could not believe our luck that the party was on the Saturday of the GARLIC FESTIVAL, and the party spot was merely 11 miles away from allll that GARLIC!!
Photobucket

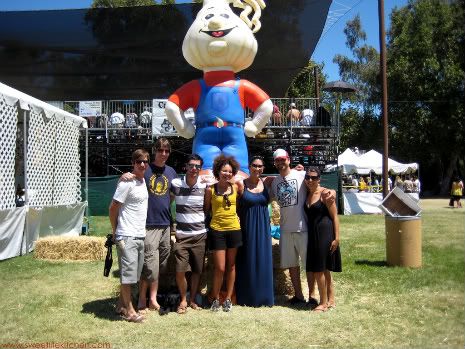
What I knew going in: there was going to be GRIPS of GARLIC...and there was going to be garlic ice cream and I was going to eat it. It was going to be H-O-T, HOT, like no-joke ragin' in the high 90's low to mid-hundreds hot.

What I did not know: This is a MAJOR fundraiser. I happily purchased a program from a super-friendly high school program-girl for $1 that supported their high school. $1 for a program, that's awesome...it has the recipes from last years cook-off (stay tuned for those), and tons of great garlic info.
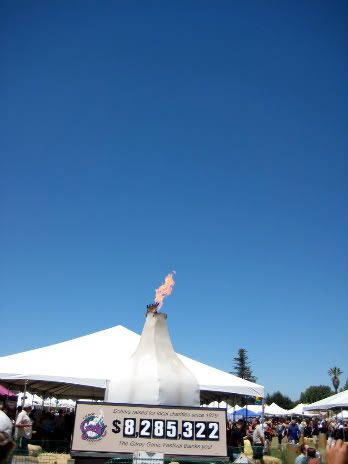
Part of that info was a breakdown of all the local schools and organizations that benefit from the funds raised each year at this yummy event. And (pictured here below) there was a big garlic-torch that noted a total of over $8 MILLION funds have been raised since the festival began.
Photobucket

With California's farms facing serious drought issues, and with everyone feeling the crunch of the current economy, this really hit home and made me glad to be there. I mean the ticket was only $12 (I would have gladly paid twice that for all the good the event does!!)
Another thing I did not know was how we would all turn into drooling children in a toy store and eat ourselves silly in no time flat.
Photobucket

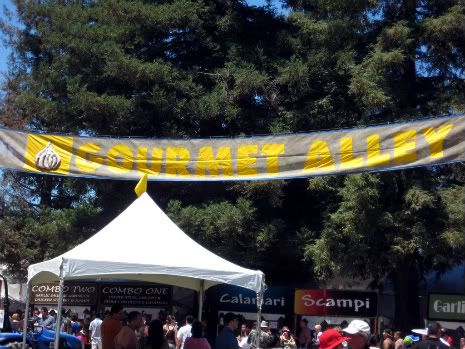
We walked right in and hit Gourmet Alley~
Photobucket
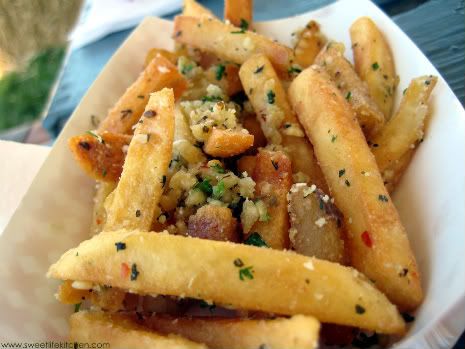
Garlic Fries

Photobucket

Photobucket

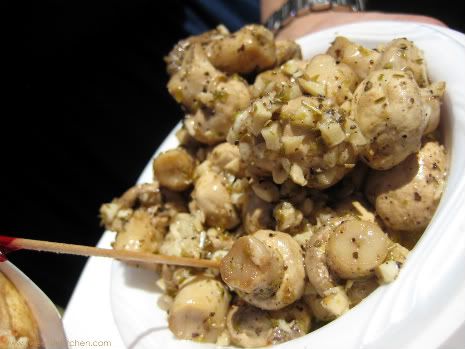
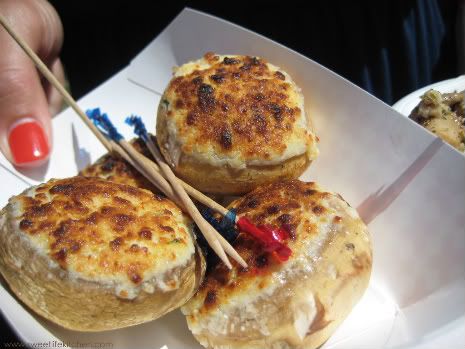
Garlic Sauteed Mushrooms ~top~ and Garlic & Cheese Stuffed Mushrooms (I will definitely be making these, IF YOU HAVE A RECIPE- PLEASE POST IT as a comment to this post!)
Photobucket

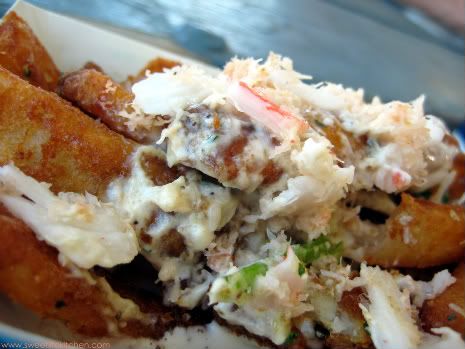
Garlic Crab Fries

Photobucket

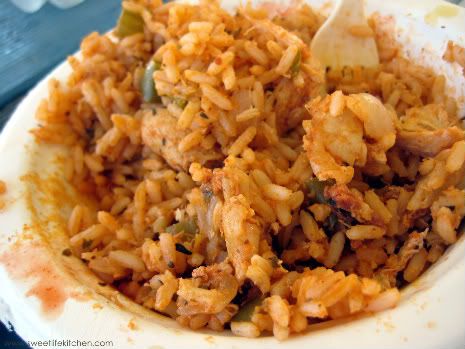
Garlic Jumbalaya

Photobucket

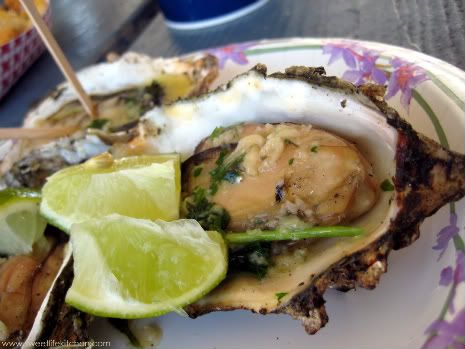
Garlic Grilled Oysters (YAY OYSTERS!!)
Photobucket

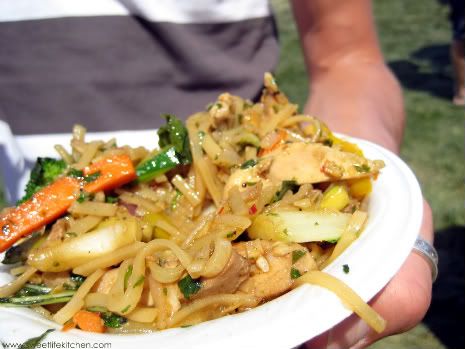
Garlic Chicken Stir Fry
Photobucket

Photobucket

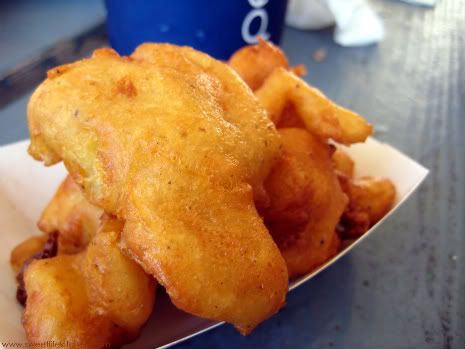
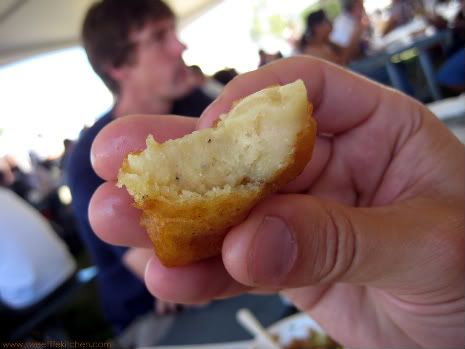
Deep Fried Garlic (this was our FAVORITE item!!)
Photobucket

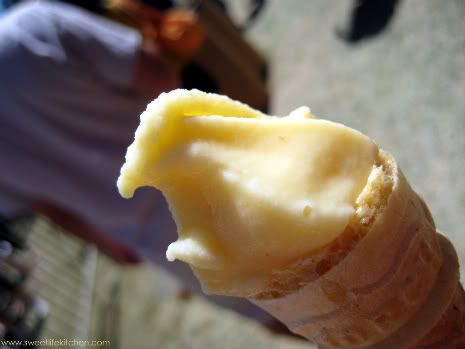
Garlic Ice Cream (SUPER EXCELLENT, I also want to attempt to make this- it was delicious!)
Photobucket

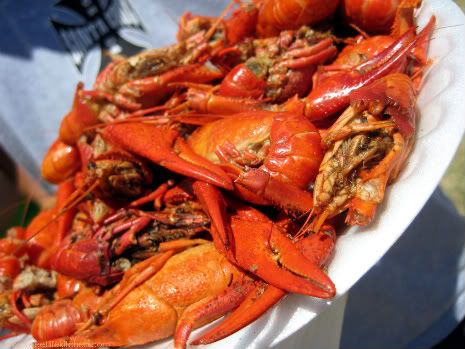
Garlic Grilled Craw Fish

In addition to the seriously scrumptious eats and fabulous fund raising, there was top-notch entertainment. We arrived a little later than planned on Sunday (FYI, plan to arrive at 9:30, the fest opens at 10, and TONS of people attend...and upon arrival, walk the WHOLE Festival, THEN start eating...those are my must-note-tips!)
In any event, the big cook-off took place Sunday at noon, and we were there, but didn't make it into the grand-stand but did watch from the giant screen. This was super exciting because Fabio, of recent-Top-Chef-fame, was our FAVORITE contestant on T.C. last season, and it was fun that he was there hosting!

The annual Garlic Festival in Gilory, CA is definitely an event you must add to your can't-miss-list. There are tons of affordable hotels near the festival, and even if you eat 'till you bust, like we did and do some shopping (there are loads of fun merchant booths too!) it is still not a budget-buster of a weekend. ESPECIALLY if you live in California~ it's a great way to support an amazing farm-fabulous community that I, for one could not live without!
gilroygarlicfestival.com

And please feel free to post any garlic-tastic recipes that you love as a comment to this post!

Friday, July 24, 2009

Napa Valley Grilled Oysters

Photobucket

During a recent trip to the Stags Leap District of the Napa Valley. We were BLESSED to be with some dear friends, one of those friends being a bartender at Anchor & Hope (and two other peeps with us being the GM and sommelier of A&H) SUPER LUCKY US.
Click here to see Anchor & Hope SF

So far what I can share with you, as far as wine experience goes, is that it's a glorious, never-ending journey. We visited 6 wineries; Chimney Rock and Pine Ridge were two of them.

More details of the trip to come...If you want to hear about each winery and details of the trip SOONER,click HERE to become a fan of Sweet Life Kitchen on Facebook , I am posting all the edible, sip'able goodness of our PCH trip on the fan page, as I will only be posting here when we open the bottles and pair it with a recipe~ like this one!

This recipe comes from Chimney Rock, where it was passed along by a local and was so simple we didn't even need to write it down...we paired it with the Dijon Clones Chardonnay we purchased at Pine Ridge Winery. The oysters and the chardonnay really brought out the best in one another (not too hard to do) and Nate & I think this was one of the BEST dinner's we've EVER made.

About the vino~ This chardonnay, from 2007, is a super summery wine. It is very light, and full of fruity-ness with out being SWEET, which we really loved.

Photobucket

About the oysters~ This recipe is most often prepared with large, meaty oysters. Nate and I LOOOOOOVE oysters and try to eat them when ever possible...we recently had an INCREDIBLE dinner at Santa Monica Seafood's newer location on Wilshire Blvd and the Kumomoto oysters were seriously divine...so we decided why the heck not- they may not be big but they are DELICIOUS, raw, grilled, delicious.


Photobucket

Napa Valley Grilled Oysters
12 oysters
1/2 cup butter (unsalted)
1/3 a large bulb chopped fennel
1/3 cup chopped shallot
(we pretty much eyeballed this- it does not have to be precise at all.)

Heat up on super low in a sauce pot JUST to melt the butter and mix, turn off heat
Meanwhile put the oysters deep side down on the grill and heat 3-5 minutes or until the shells start to pop open (if one does not want to open- toss it, peace out oyster.)

Photobucket

Remove them from the grill and use an oyster shuckin knife and pop those tops!! loosen up each lil oyster and spoon the super amazing, delicious fennel-butter-shallot extravaganza on to each oyster...
Put the topped off oysters back on the grill for about 3 minutes or until butter starts to bubble and they are all heated through.

Prepare to have your socks knocked OFF.

Photobucket

Tuesday, July 21, 2009

Angel Food Cupcakes

Photobucket

With all the heavy eating we had planned for the 4th of July weekend, I struggled to think of something that would be sweet and desserty at the end of the day with out being too heavy...so I thought angel food cake would be light and still substantial enough for our sweet tooth after a long day of bike riding in the sunshine...

I came across The Cupcakery Blog , where Wendy had highlighted the Angel Food Cake recipe from the Buttercup Bake Shop Cookbook, which was, as promised, easy to prepare.

We are talking MAJOR egg whites here...2 cups, which is about 14 eggs worth...Wendy suggests just purchasing the carton of egg whites (which I didn't do this time, but that would make it even easier, so I will do this next time...)

Photobucket

This made 24 mini cupcakes and 12 regular size…

1 cup cake flour
1 1/2 cups sugar
14 egg whites (2 cups)
1 1/2 tsp. cream of tartar
1 tsp. pure vanilla extract
1/4 tsp. salt

Preheat the oven to 375° degrees and line the muffin tins with paper wrappers.
In a medium bowl, combine flour with one cup of the sugar. Sift these together three separate times. ( I am pretty sure this is essential, so you will need a sifter for this recipe…) Set the sifted whatnot aside and put remaining sugar in a separate cup for later use.
Pour the egg whites into the bowl of a stand mixer and use the whisk attachment, mix on lowest setting for about 1 minute. Then add cream of tartar, vanilla and salt.
After another minute of beating, turn the mixer to medium speed and gradually add the 1/2 cup of remaining sugar. Stop and scrape the sides of the bowl with a rubber spatula after all the sugar is added. Resume beating until the whites are stiff but moist. (This should take about 5 minutes.)Transfer the egg whites to a large bowl. Sift the flour-sugar mixture over the whites and gently fold until all the dry ingredients are mixed in. Using a ladle, fill the cupcake liners about ½ full, or a little less than ½ full.
Bake about 8-10 minutes, but not any longer to prevent the bottoms from burning.
Cupcakes will be done when a toothpick comes out of the center clean. Remove cupcakes from the pan and place on a wire rack. Cool completely before frosting.
I made these and took them (un-frosted) with a big bowl of fresh strawberries and a container of Cool Whip to our HB 4th of July gathering at Jeff & Lia’s and they made a great late night (meaning 9pm) sweet treat!

Photobucket

Sunday, July 19, 2009

BBQ Bison Meatballs

Photobucket

Bison Balls. YUM. These are deeeelicious. Bison is a lower-fat, super awesome alternative to ground beef for burgers, meatloaf and in this case, meatballs. Another of my Hollywood Bowl tote-along-menu...these were easy to carry in a pyrex and make a terrific picnic-tailgating-bonfire summer treat!
Nate used this recipe recently and gave it his own twist to prepare a Bison Grilled Meatloaf, which we'll get posted soon!!

BBQ Bison Meatballs
(makes about 12-15 balls)

1 lb ground bison
1 T bbq sauce
1 T spicy brown deli mustard
Heaping 1/2 cup bread crumbs
1 egg
a few tsp parsley
1/4 of a sweet white onion finely chopped
few good shakes of each:onion powder & garlic powder
Kosher salt & fresh ground pepper
bit o chili flakes- just a pinch...

Preheat the oven to 400 and cover a baking sheet with foil (spray it with non-stick spray)
In a large bowl combine all ingredients and mix well using your hands.
Roll the mixture into balls about 1 1/2 inches in diameter and place the balls on the baking sheet about 1 inch apart.
Cook 7 minutes, then turn the meatballs over~ cook 7 more minutes, flip them again to a different side and cook 5 minutes... turn off oven and let the balls sit in there about 3-5 more minutes.
Let the balls cool and place them in a lidded container...squeeze some more bbq sauce into the container, put the lid on- shake it up- and refrigerate, serve em cold.